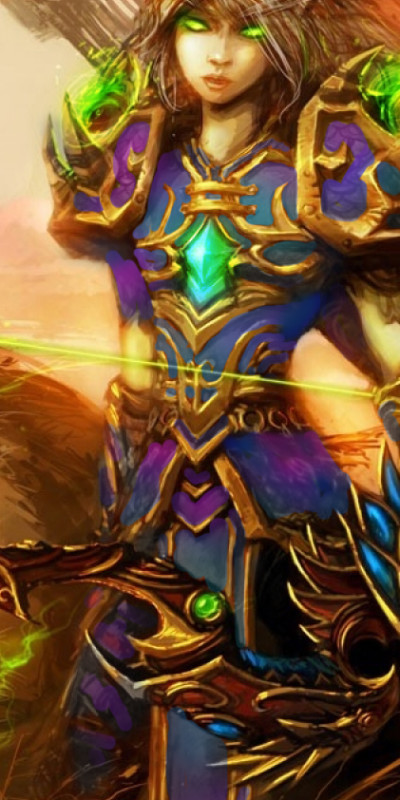
I chose hunter as my first class, partially because I fell in love with fan art done by Yao Ren Wo. The armor in the picture, the ‘Sunwell Hunter Set’ is traditionally Red & Gold (Brutal Gladiator’s Pursuit) or Green & Bronze (Sunwell Hunter). However I fell in love with the Blue & Gold that Shamans had. I’m able to wear that set in game because of Transmogrification, and figured, hey, let’s make that version for my cosplay.
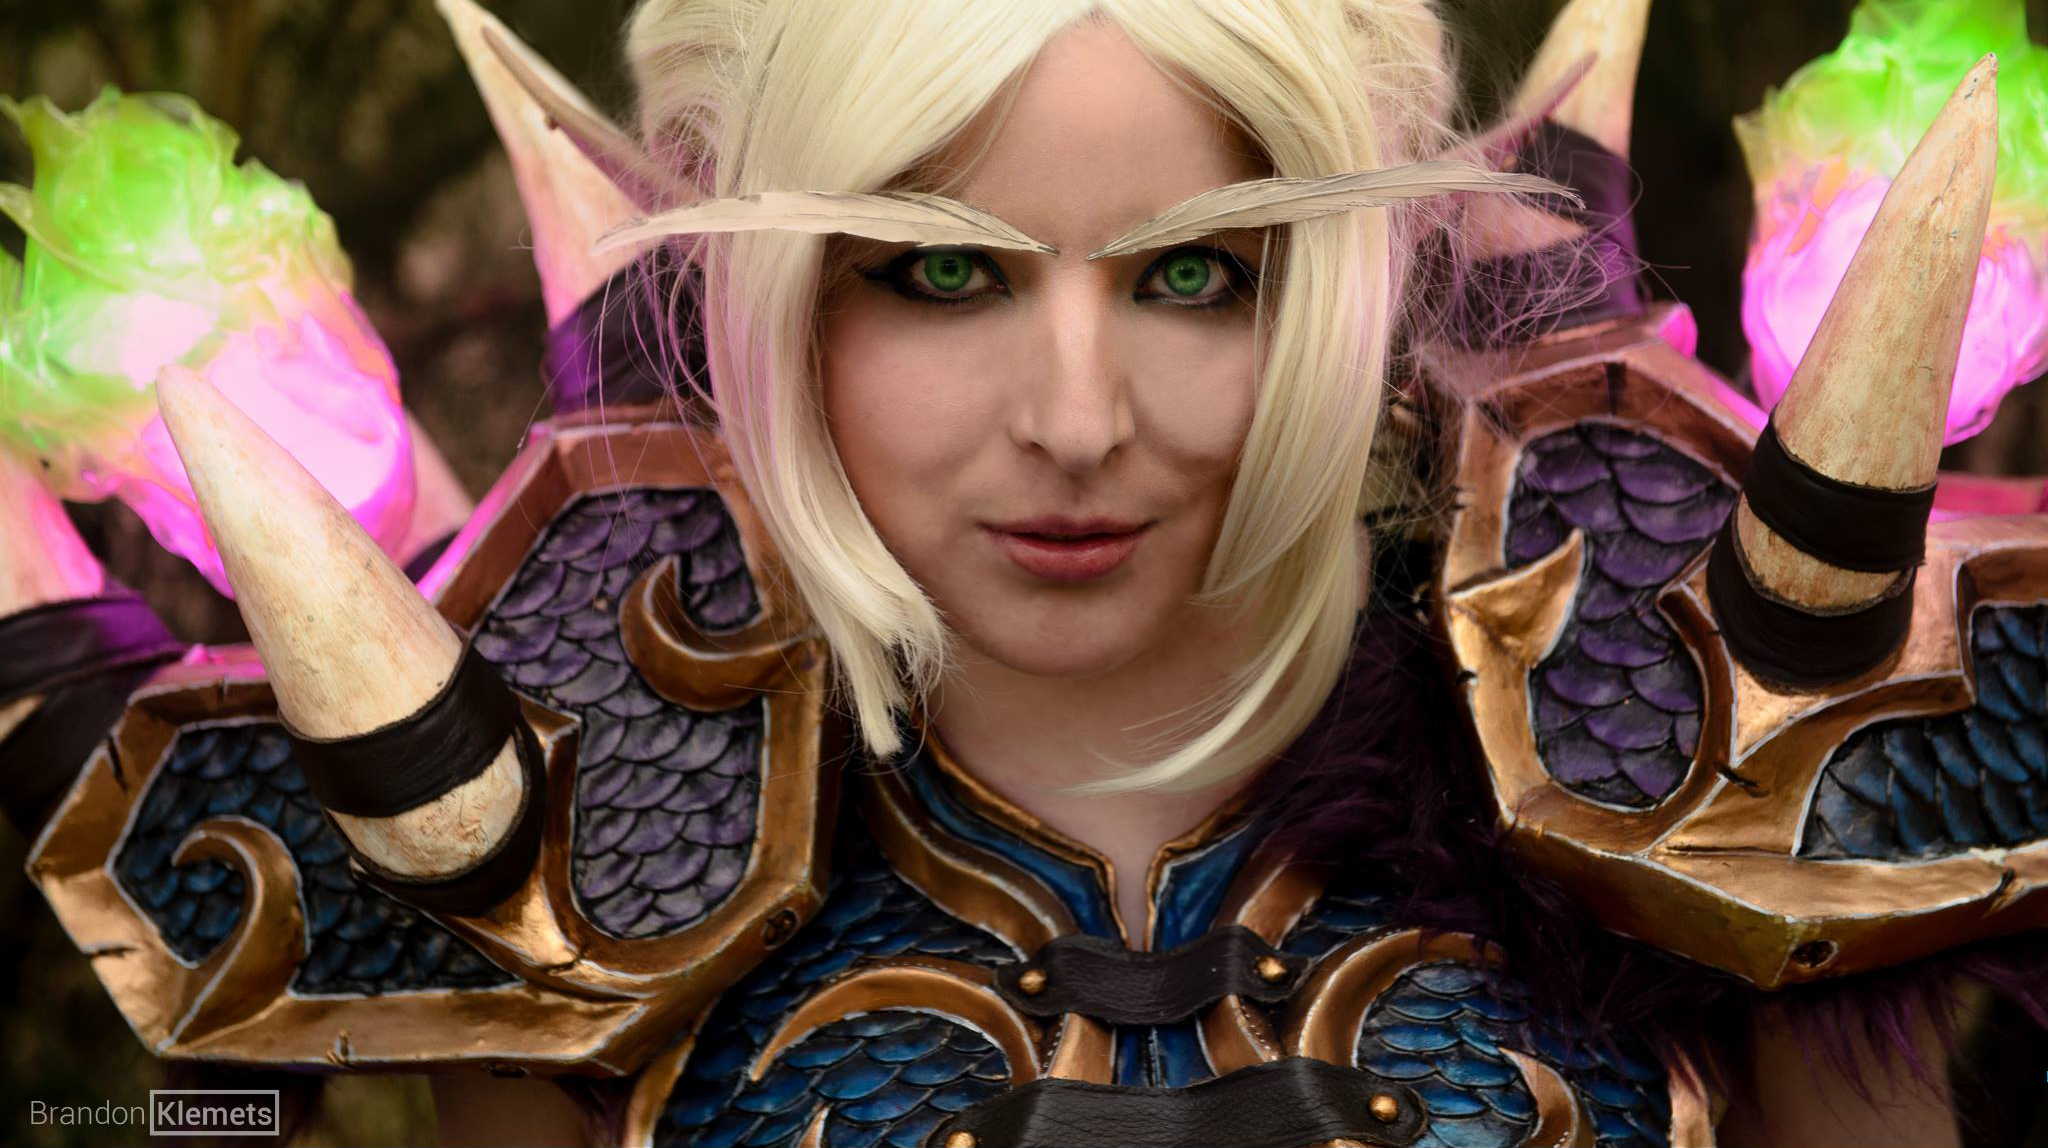
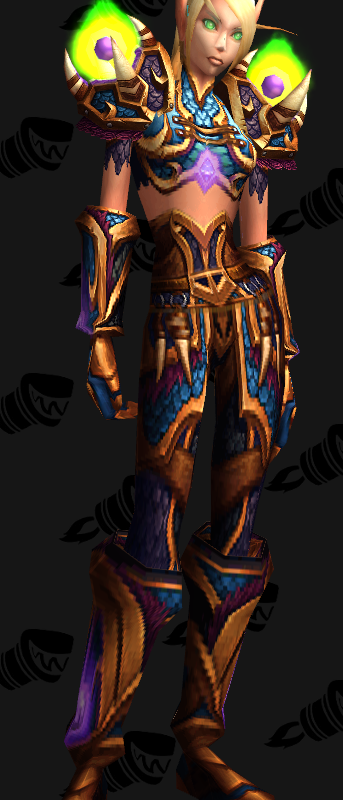
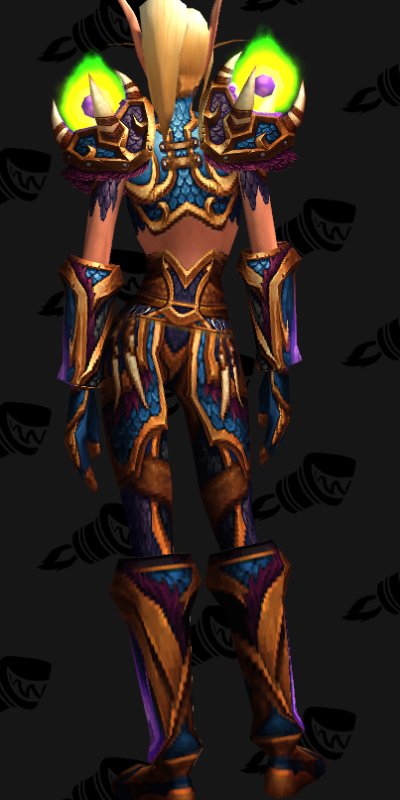
At first I was planning to make my own version, with some elements of fan art, other cosplays, and the original. Because of this I fiddled around in the early part of the summer making armor pieces that I didn’t end up using. I went through three designs for my boots before I settled on one that was closer to the in game ones. Same with my vambraces –though this only took two attempts.
These early versions are pictured to the right.
From here I went on to refine the armor, which I made mostly out of the thermoplastic Worbla and 2mm craft foam. Details were added with worbla strips and bevels, as well as sculpted areas of Free Form Air, a lightweight epoxy putty made by Smooth-0n.
Details about the specific pieces are shown in each of the sections below.
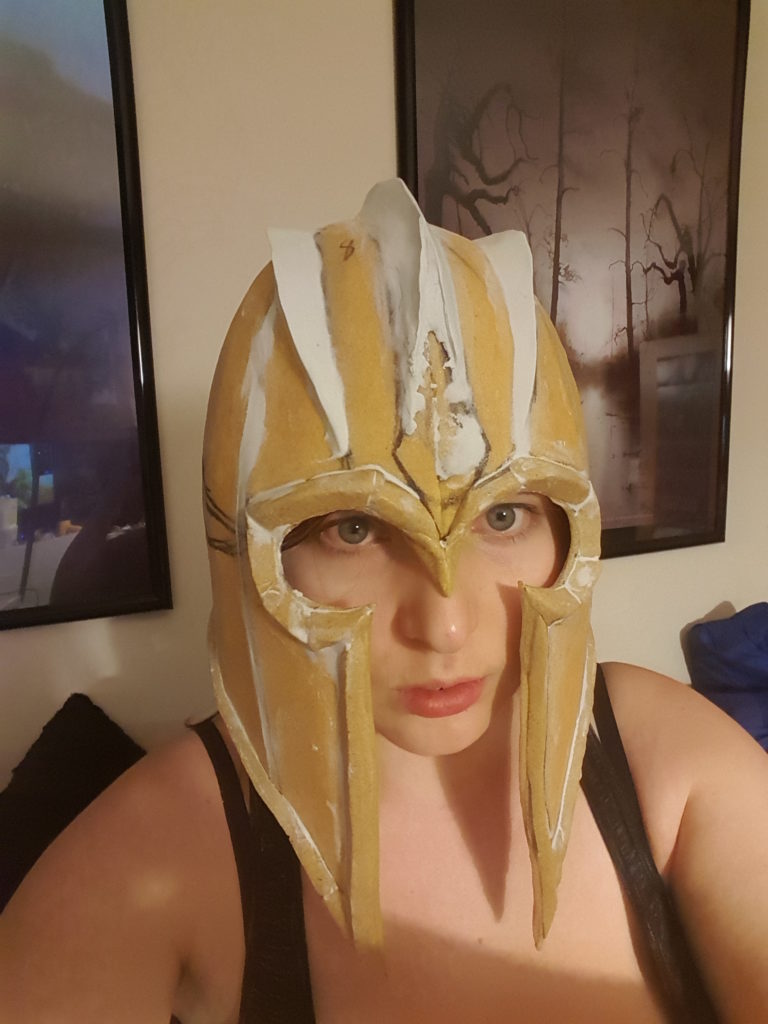
The pattern I used for my helm was based on Kamui Cosplay’s from her Pattern Collection. However my head is larger and I wanted to account for a wig, so I enlarged the pattern and fiddled with the shape to resemble the set helm the Cowl of Gul’dan.
I made my original patterns with foam, and once I got the shape right, I covered that with worbla and stuck the pieces together. This got a pile of beveled trim that I made with a bead roller and worbla. At the same time I used Free Form Air to smooth the cracks between pieces and to create the ridges along the head.
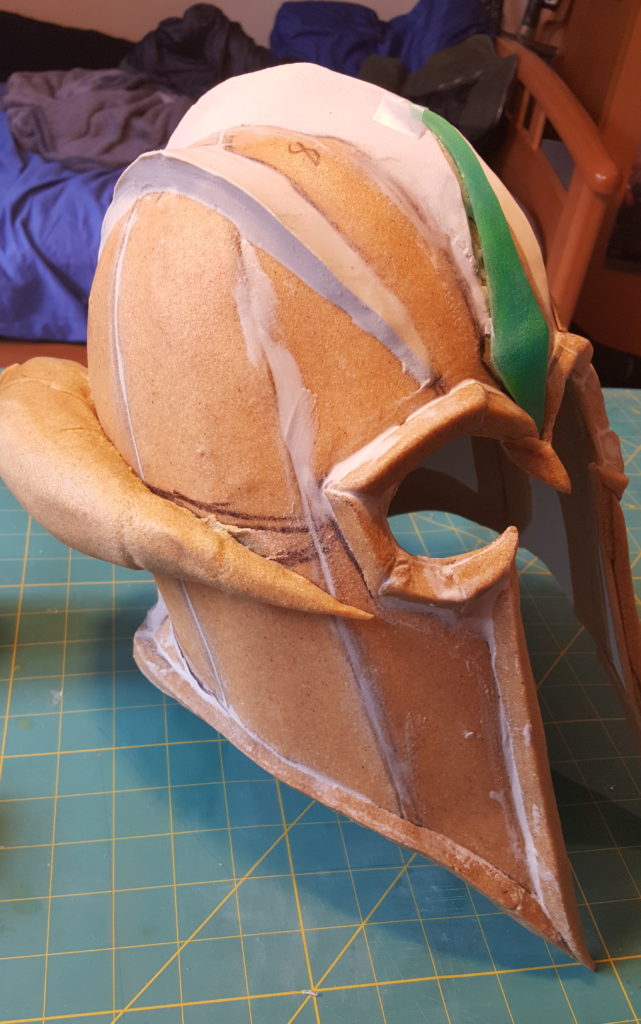
I had a lot of trouble with the horns that wrap around each side of the head. I tried using the worbla-wrapped foam method, only I used floral foam instead of insulation foam and it crumbled everywhere and generally didn’t work out. The two halves didn’t end up symmetrical, which was pretty disappointing.
At this stage I also cast a gem for the brow and shaped it to fit against the middle ridge. This would later have a hole poked to allow for an LED.
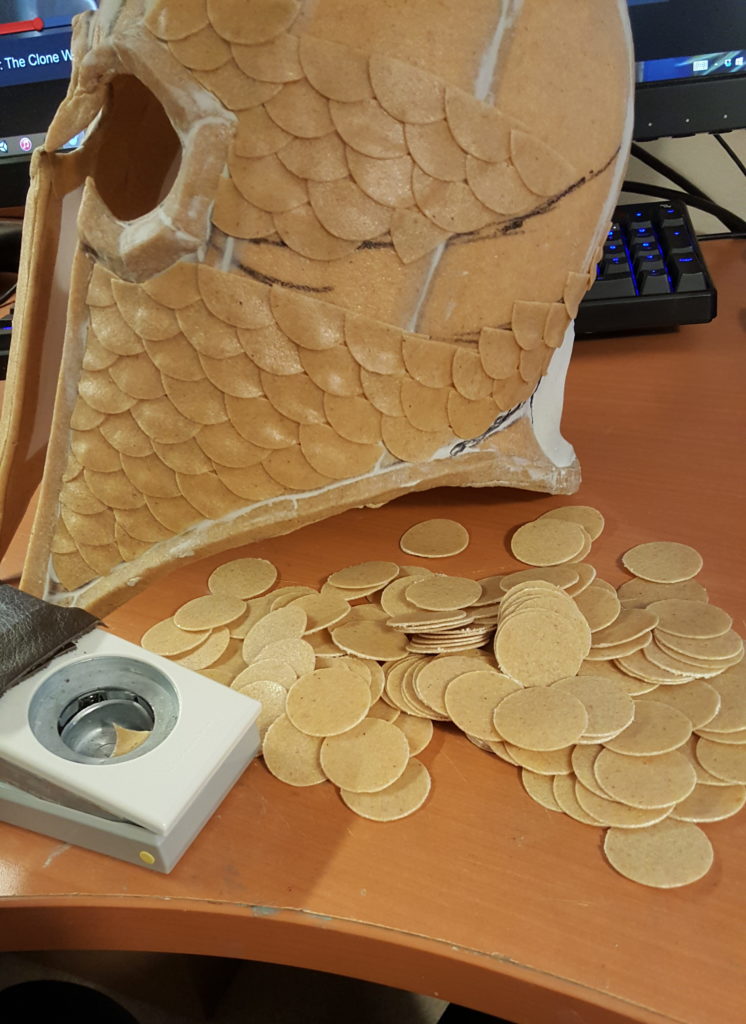
I punched several hundred circles of double thick worbla out with a punch, then cut them in half, heated them up and laid them on as scaling, since I didn’t just want to paint the texture on, but actually have it there.
I used this technique for the whole costume. and punched about 1,500 circles, which were heated up and applied by hand (this used about 2/3 of a jumbo sheet of worbla).
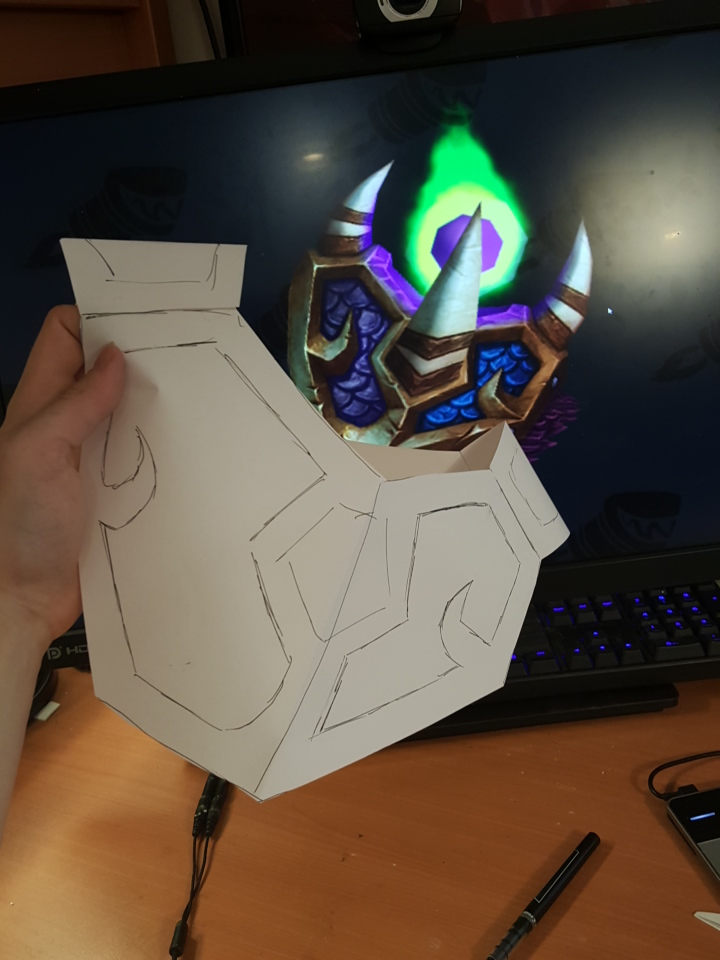
First I sketched the shape of the pauldron onto heavy cardstock from looking at the 3D model on Wowhead’s Model Viewer.
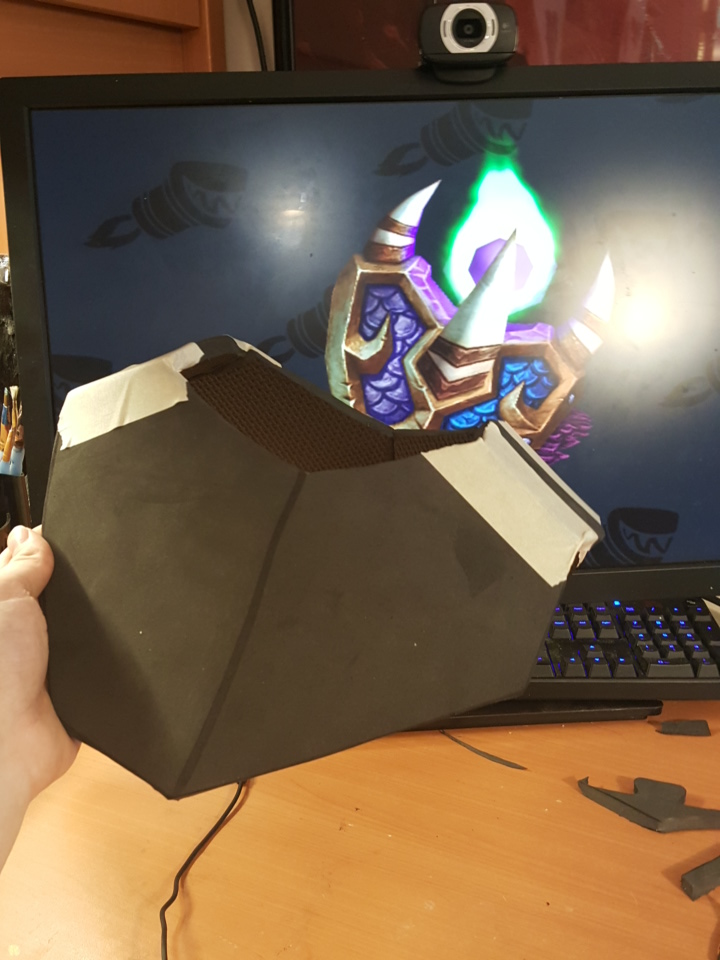
This got transferred to EVA foam floor mats and put back together to test the fit and size of the shoulders.
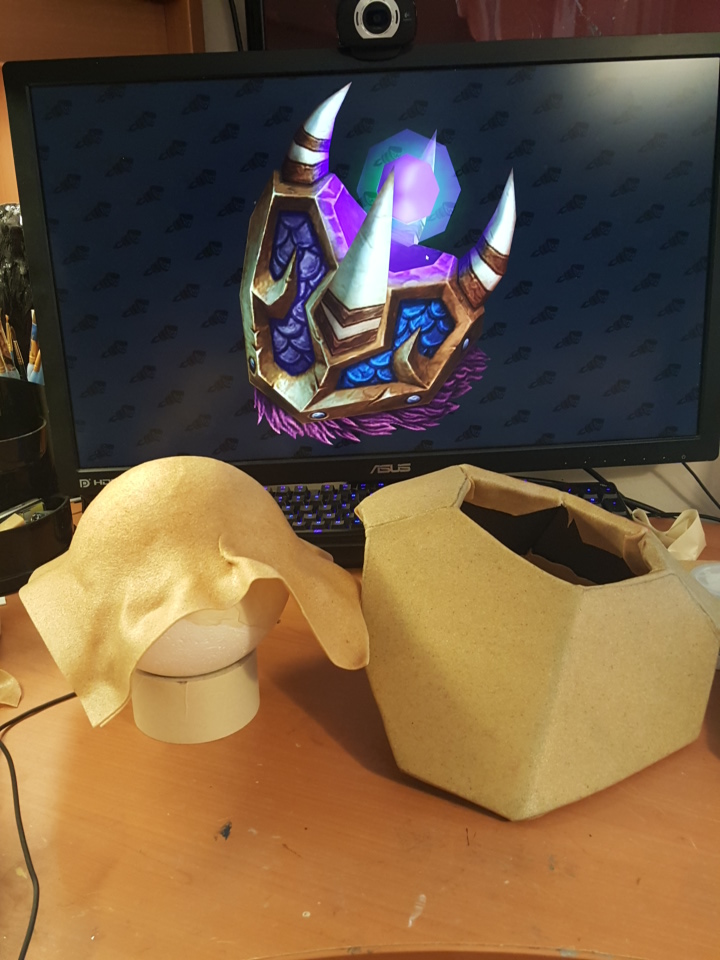
I used the boobplate method to create half -spheres that would be recessed into the shoulder where the floating fire orb would sit.
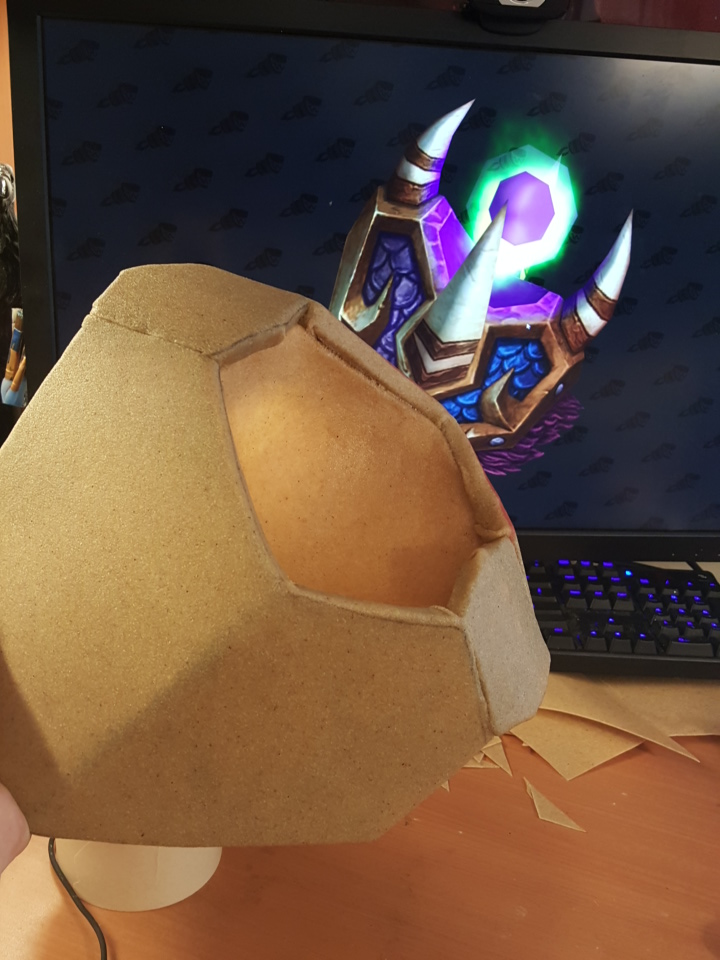
I heated it up and stuck it on the inside of the pauldron.
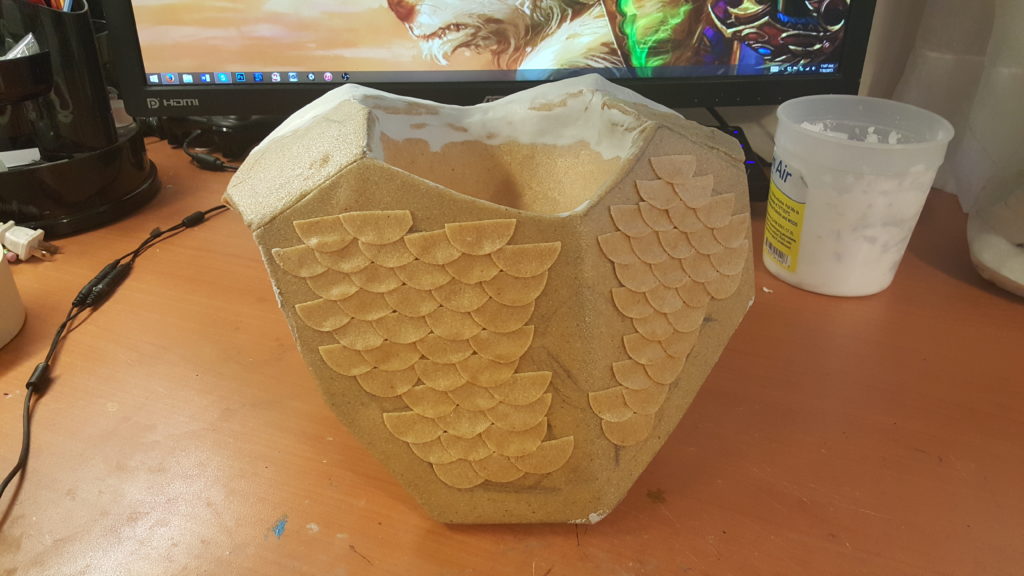
More scales were attached in the areas that were visible since I planned on sculpting the bevels which would hide the rest.
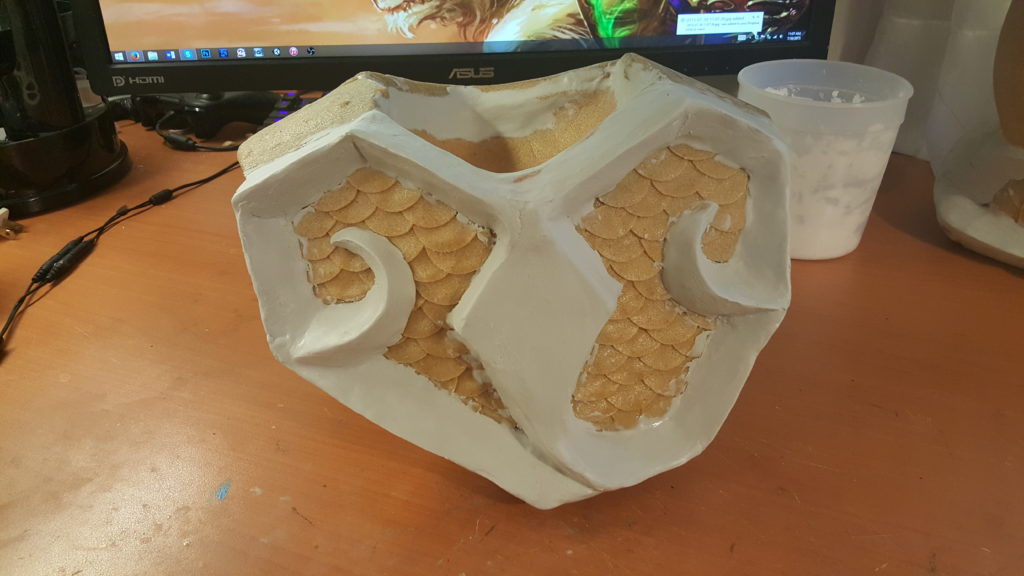
Bevels got added with Free Form Air and cleanup of seams and overlaps was done.

More spikes were made with floral foam (I don’t recommend it) and attached with epoxy.

The floating fireballs were acrylic ornaments that were sanded and painted purple to diffuse the light on thin clear tubes to make them seem to float.

Each ball had three 12 Neopixel LED rings that were controlled by a central arduino that lives in one of my shoulders.

Here I was practicing some light effects and colors to find the right shade of purple.
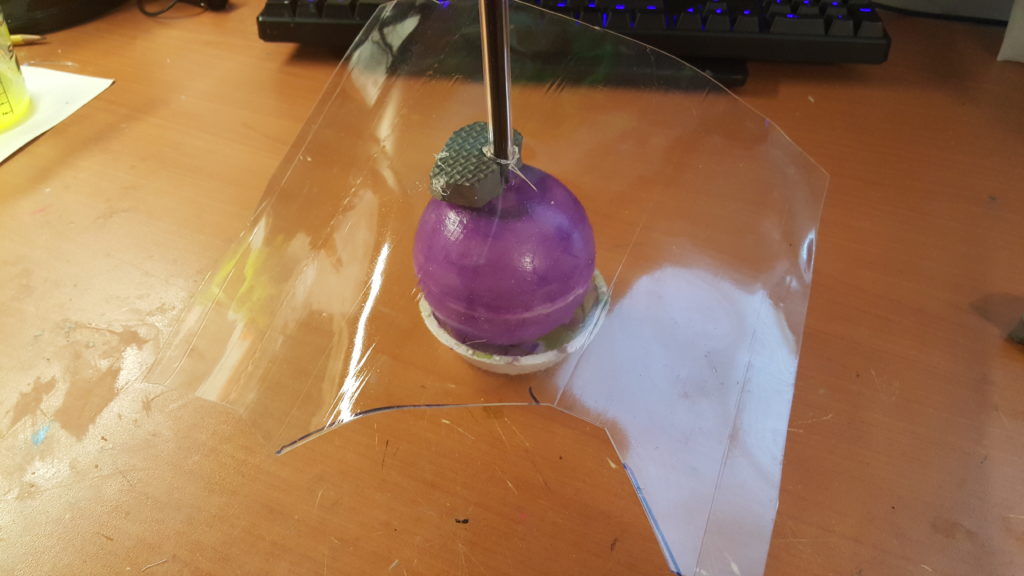
The balls were then wrapped in Worbla’s Transpart to simulate flames.
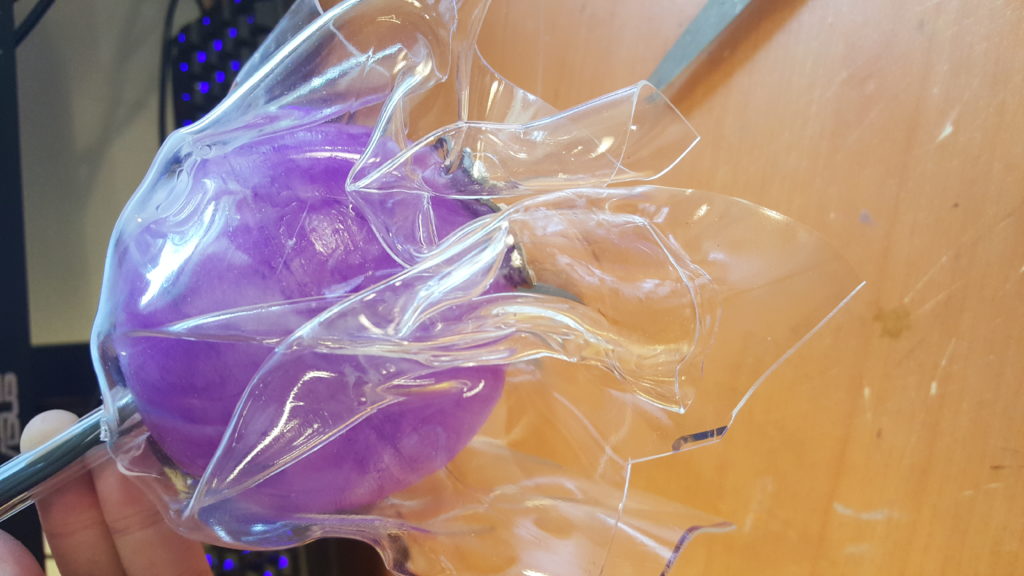
After much unhappiness and tweaking, they came out pretty alright.
I added sweet smoke effects to my shoulders!
Most of the process of the worbla base is shown in the video below.
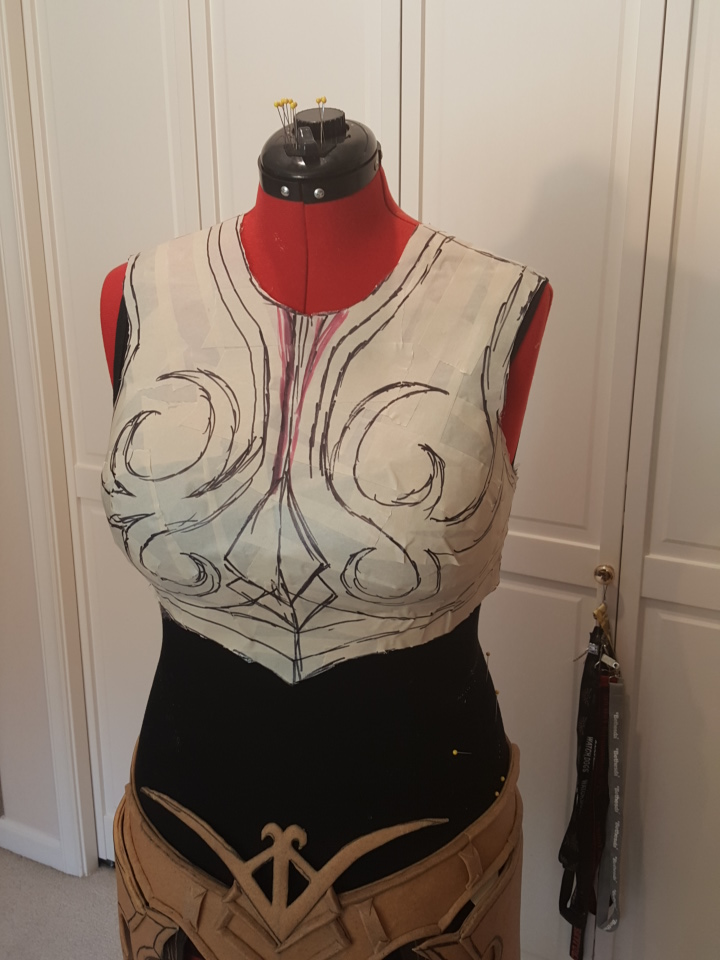
I started with a tape and plastic wrap pattern detailed in the above video.
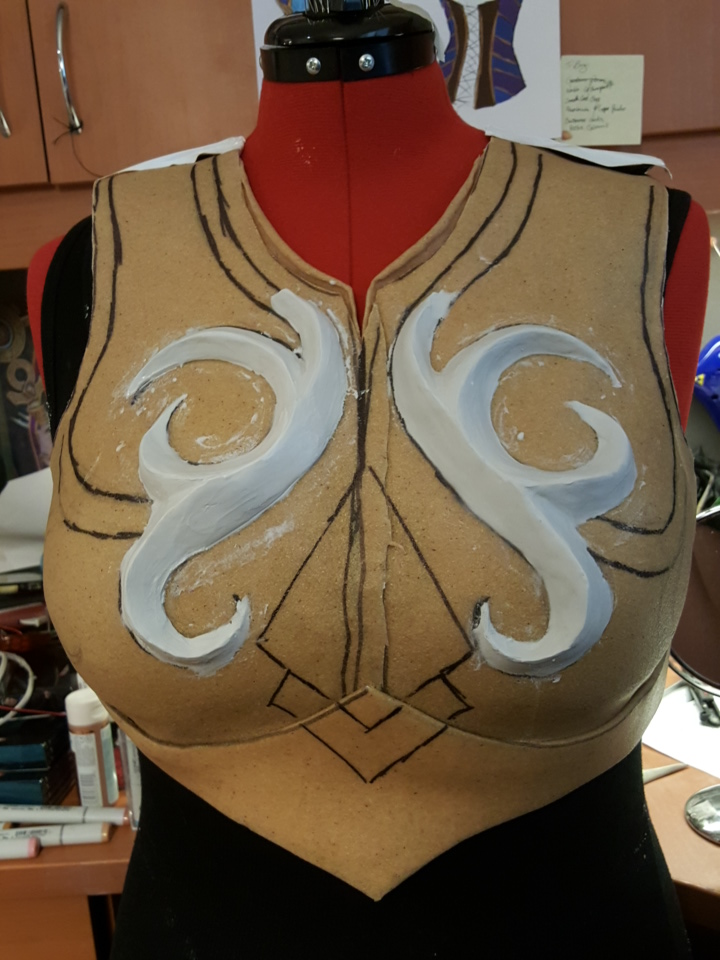
This was transferred to worbla and details were drawn in.

More sculpting was done and the gem was added in. I ended up removing most of the underbust area because it was making my torso seem shorter.
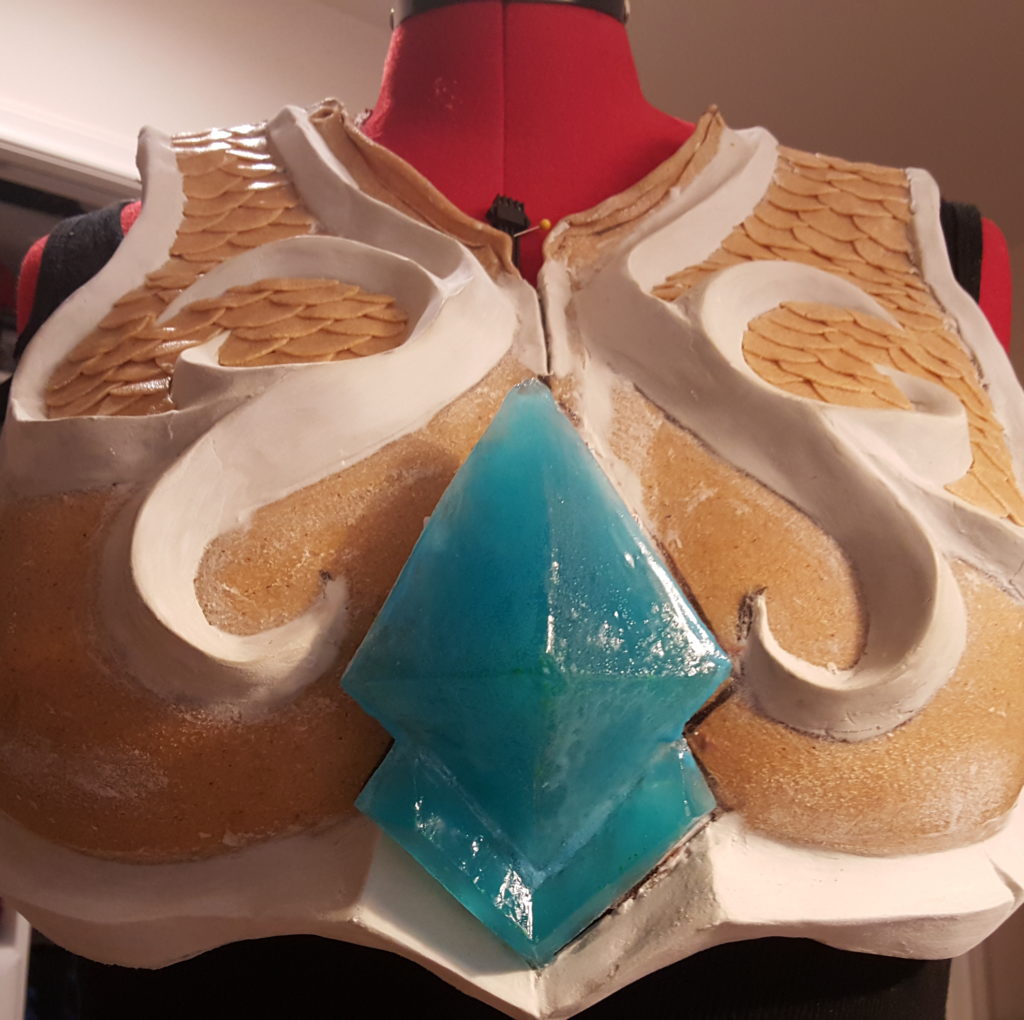
Scales were added and a test cast of the gem inserted. This single bevel is what I ended up going with, which looked pretty good.
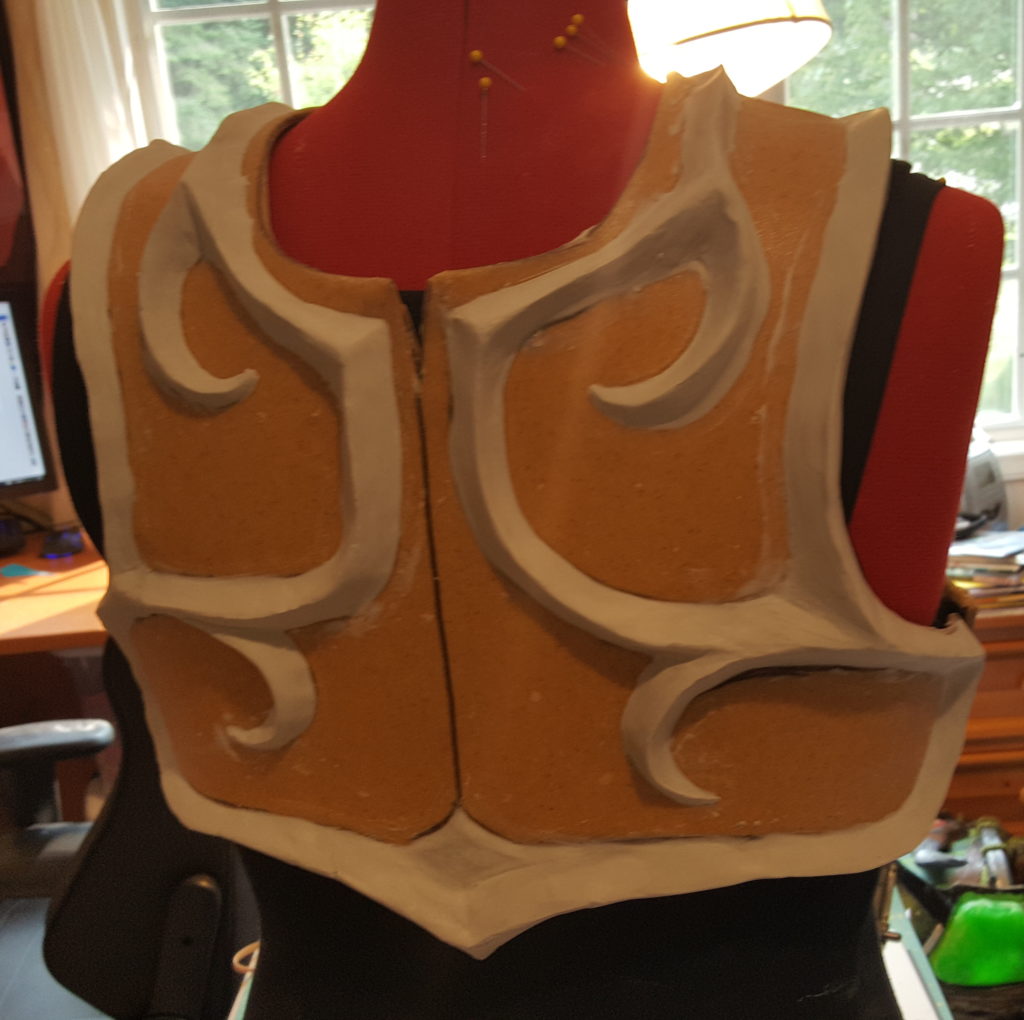
Even the back has to look good, though its hidden behind my cloak.
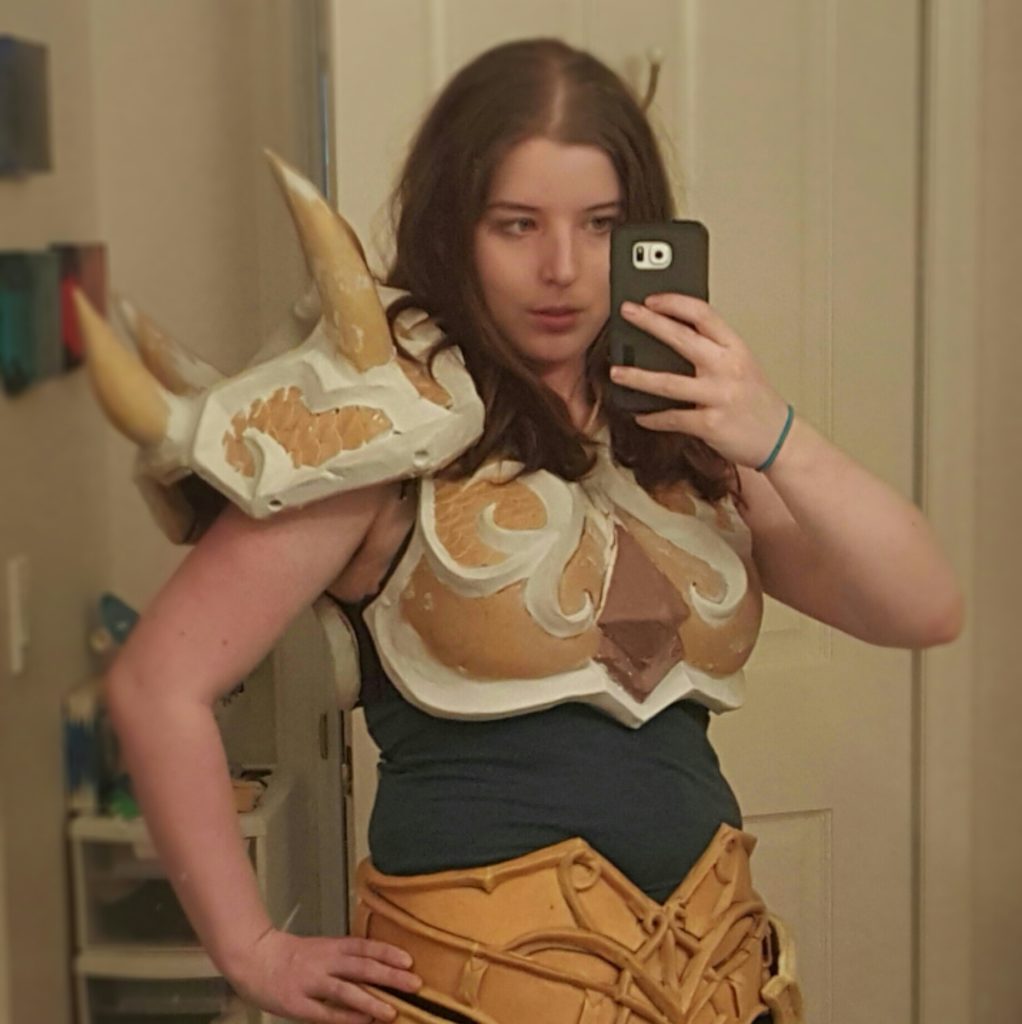
Here I’m trying on several pieces of the set.
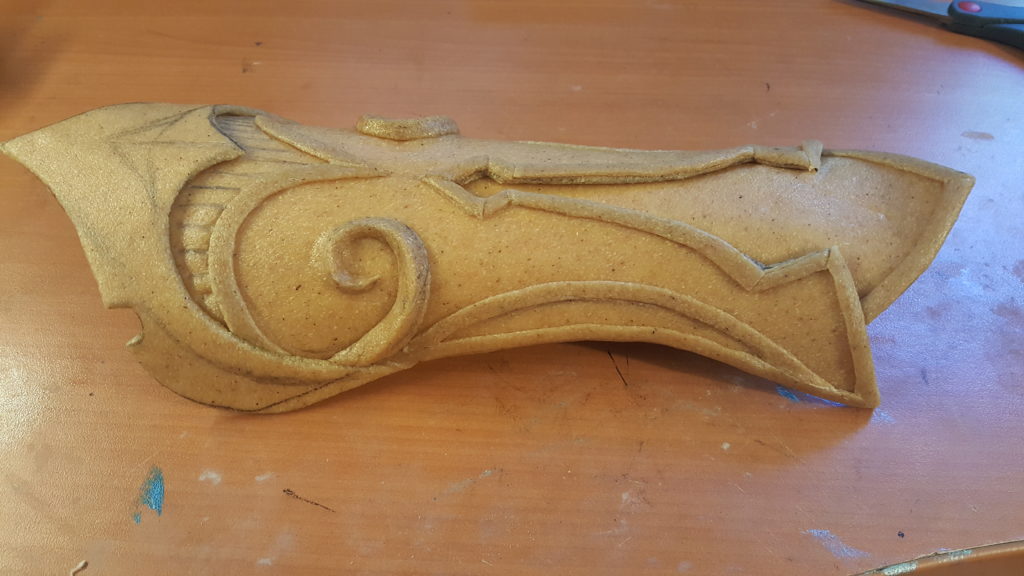
Vambrace made with worbla and some artistic freedom.
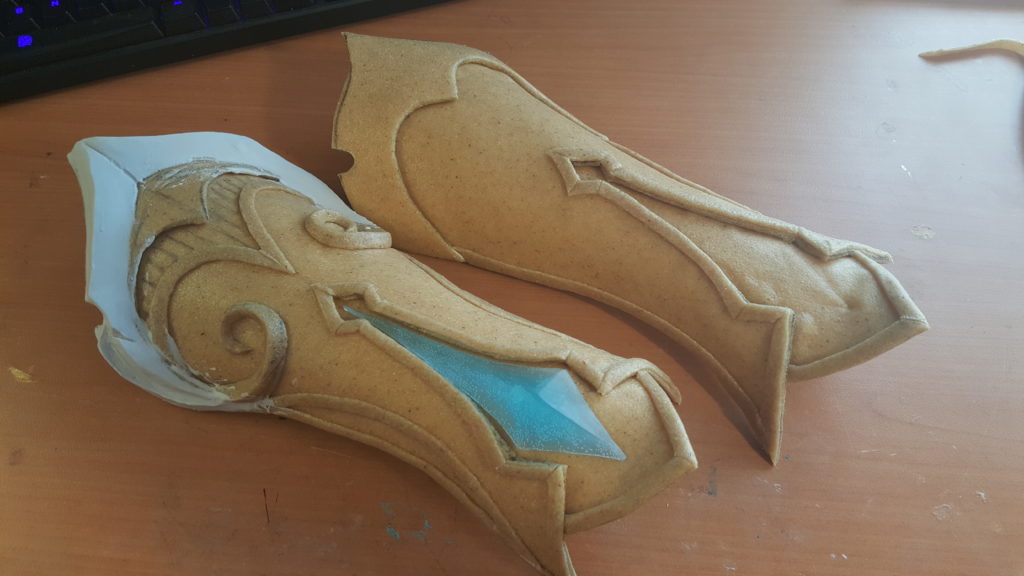
More sculpted Free Form Air was added (are you sensing a pattern yet?) and a gem was added.
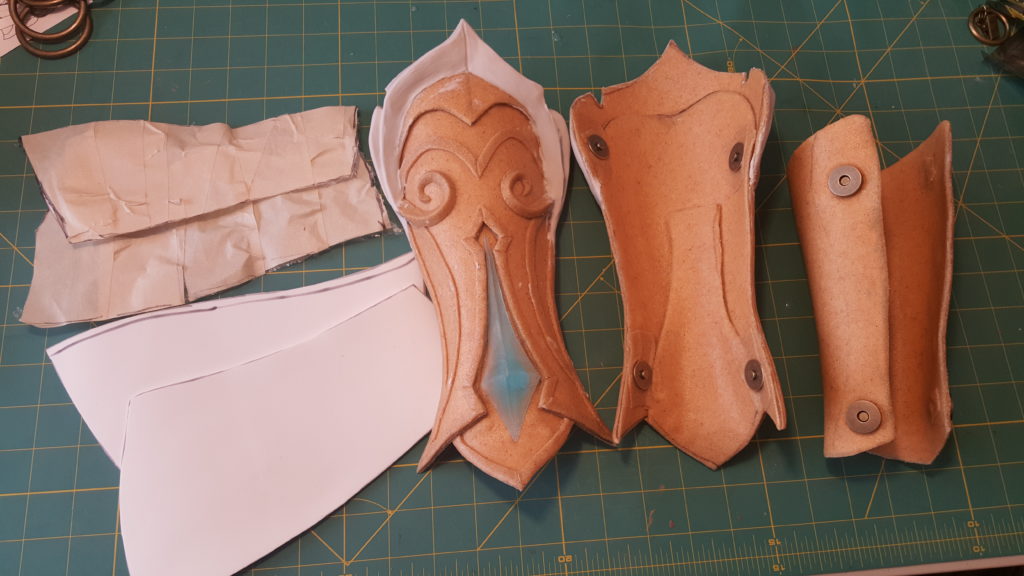
The outer shell attached to an inner vambrace via magnetic snaps.
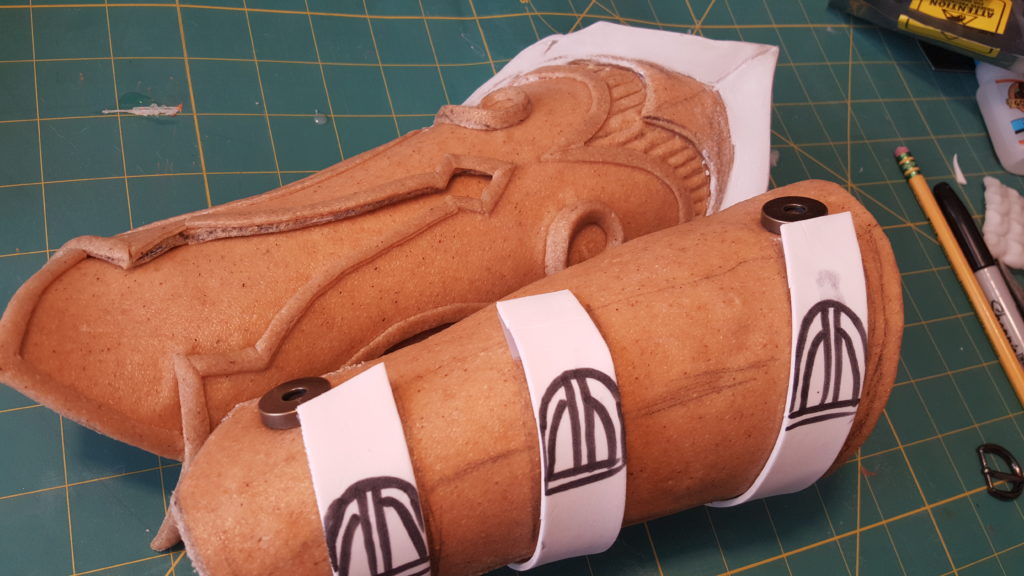
Foam patterns for faux straps and buckles were made.
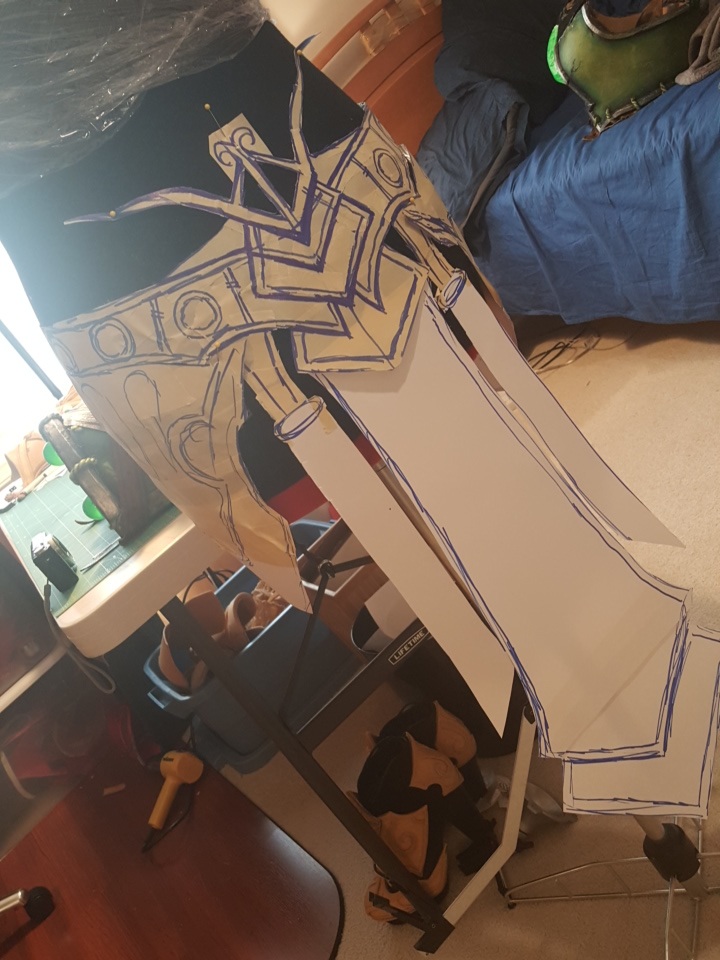
A pattern was made for the belt, tassets, and tabard using the tape method.
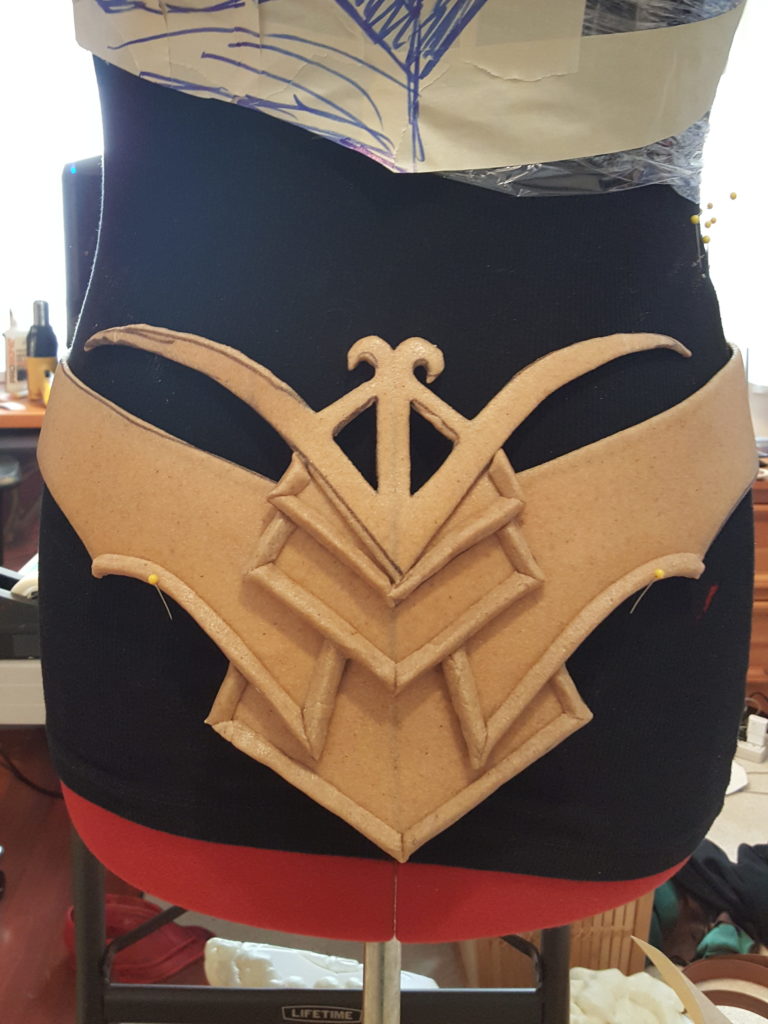
This was transferred to worbla, where it got a pile of bevels.
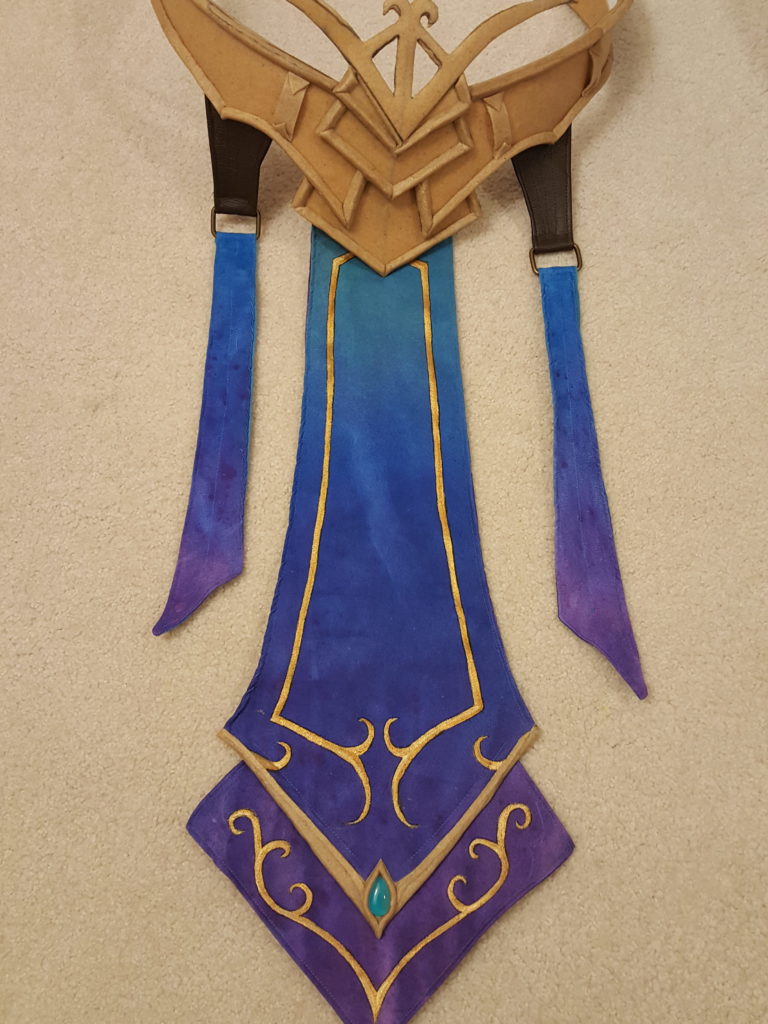
I hand gradient dyed some microsuede cloth. This was used to make a tabard and then painted.
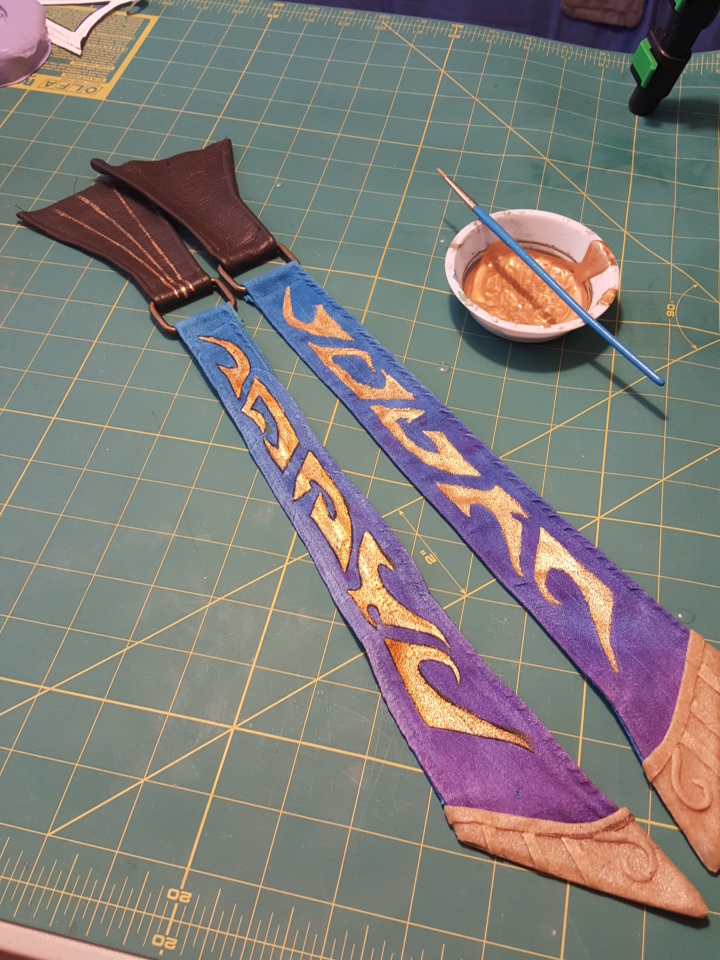
More painted symbols, with black outlines to make them pop.
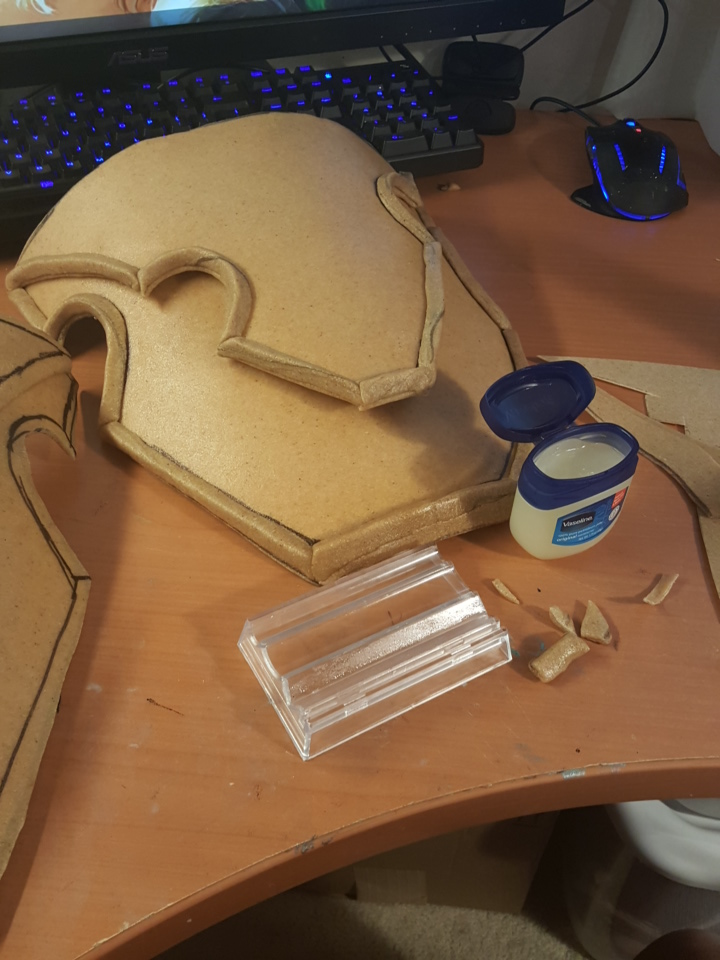
Here I’m using Vaseline to lubricate the bead roller that I used for making the bevels.
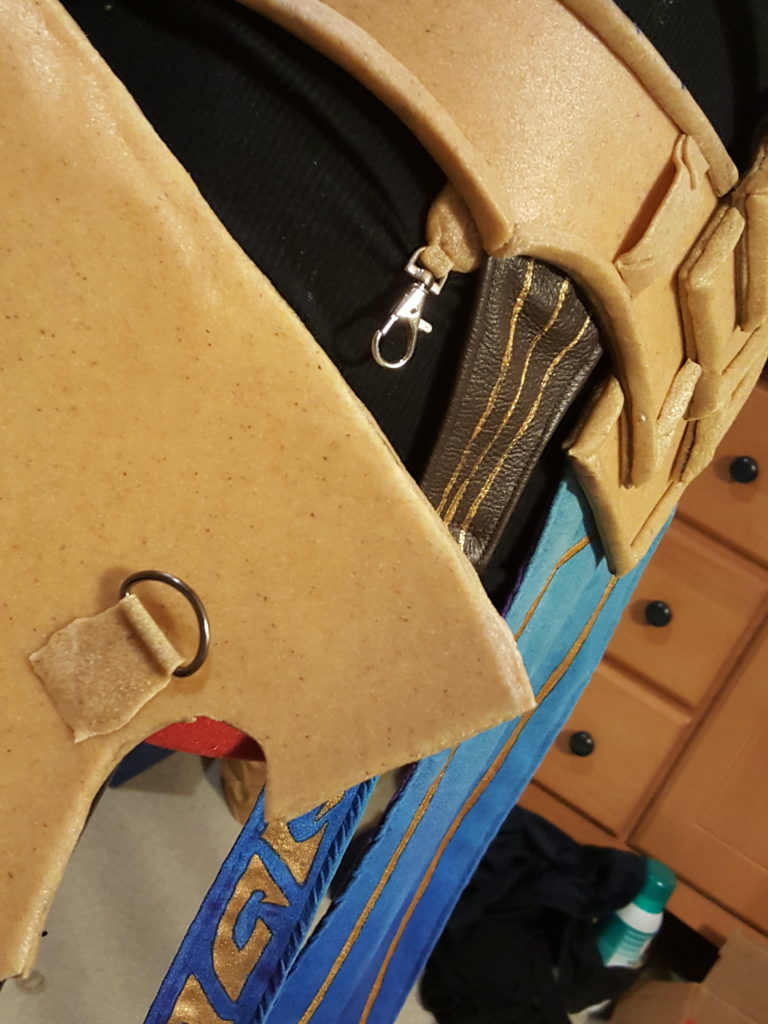
The tassets were connected with lobster clasps and elastic.
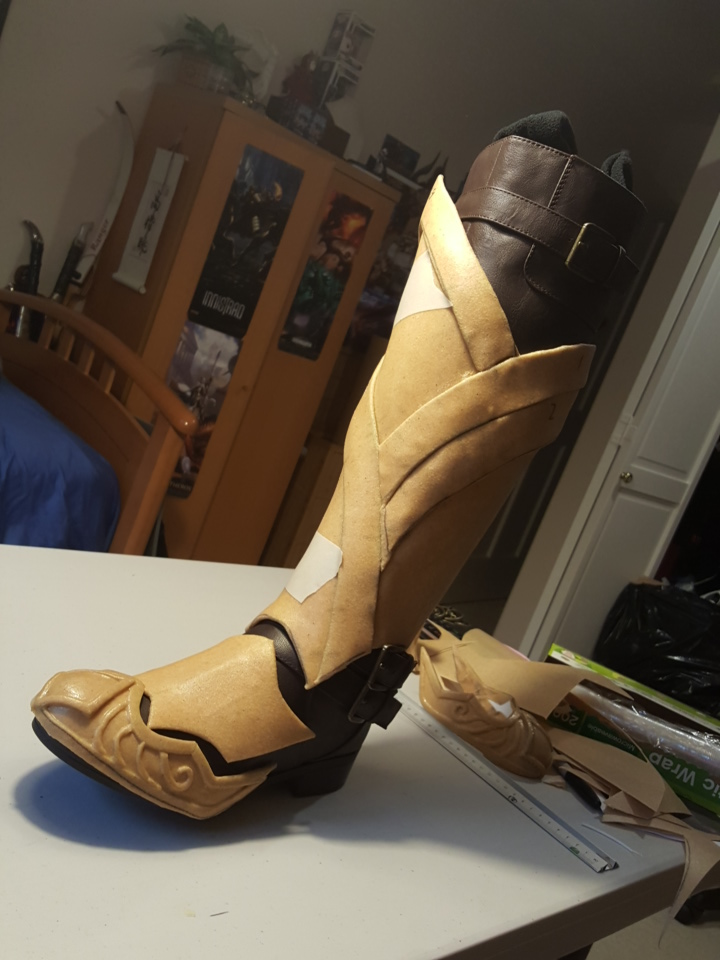
After several attempts at the boots, I decided on going with something more accurate to in game. Because of this I bought a new pair of boots and adjusted the foot armor to fit them.
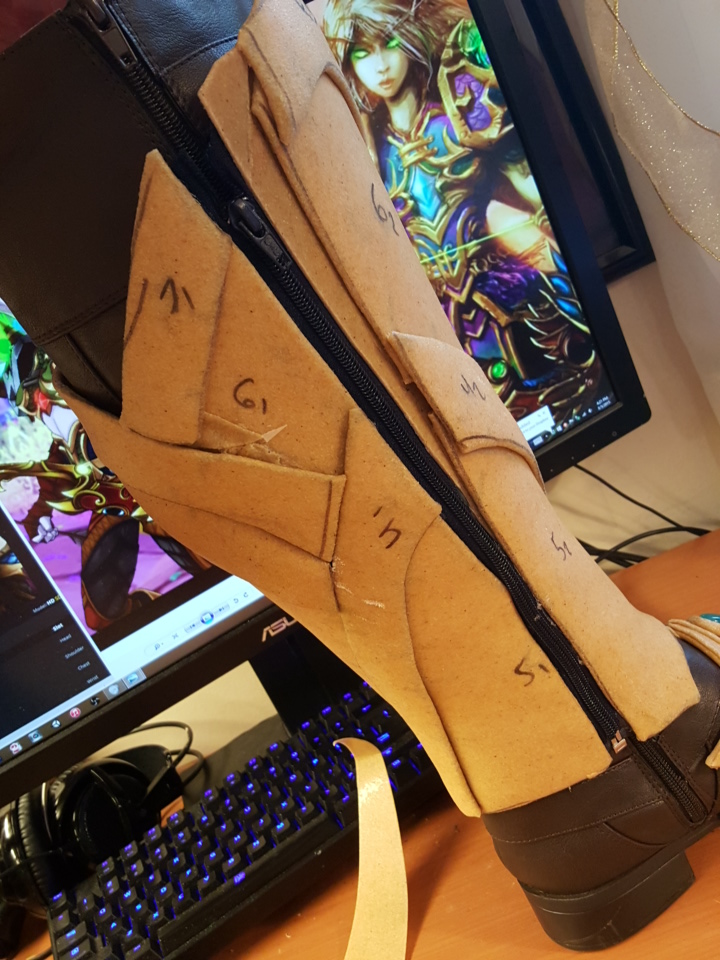
There were a lot of individual pieces, but they all held together and are attached with a zipper.
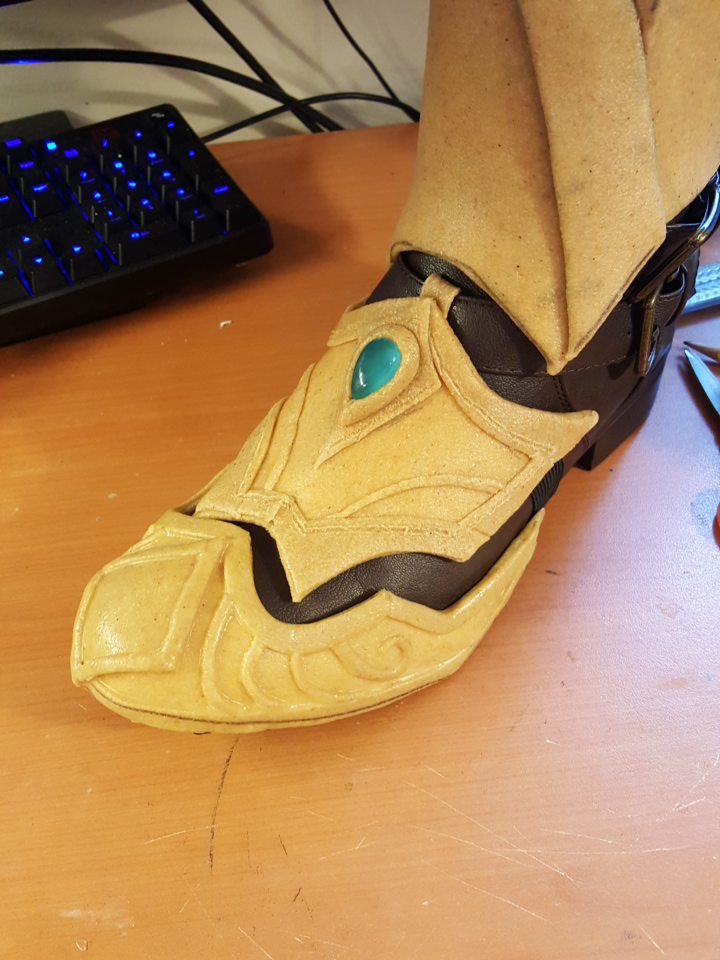
One of the armor pieces on the toe is held on with a little loop of worbla to straps on the boots. The toe piece is friction fit.
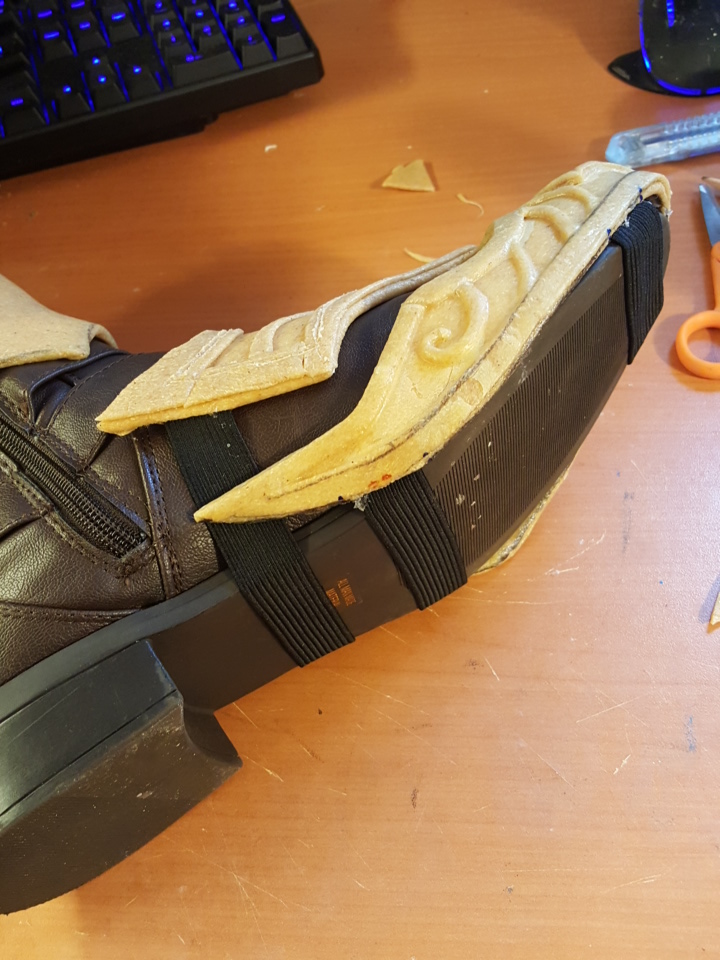
I used elastics to hold the pieces on, which worked pretty well but I lost one toe piece at Blizzcon that I then had to replace for a photoshoot.
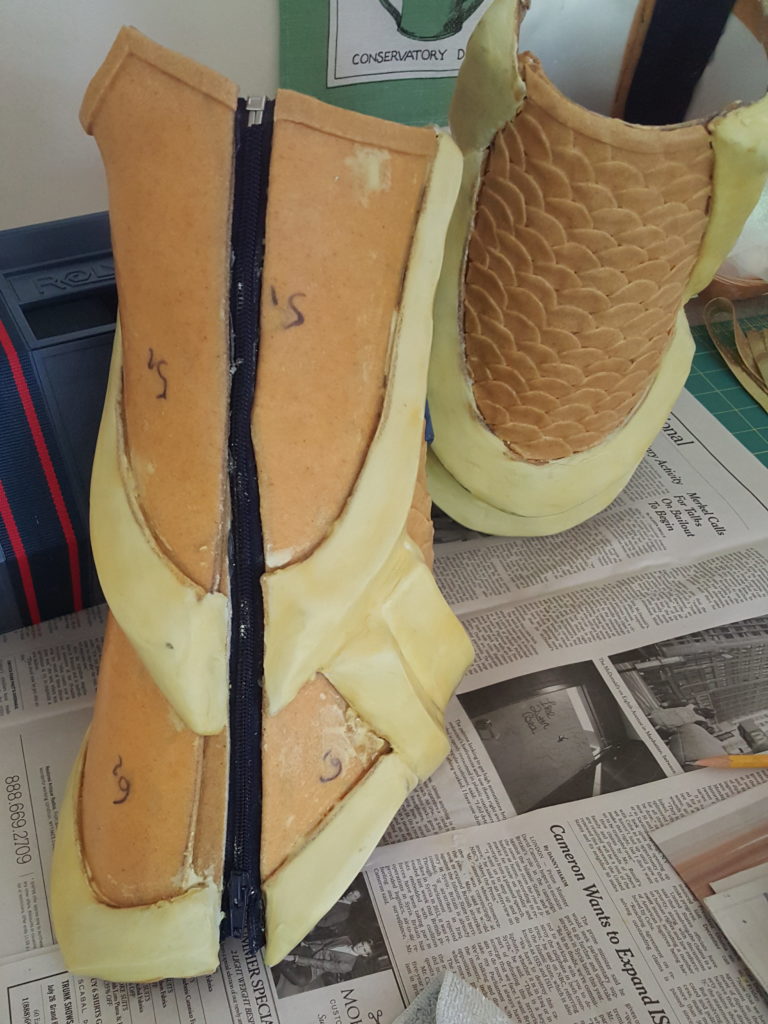
More sculpting and scales.
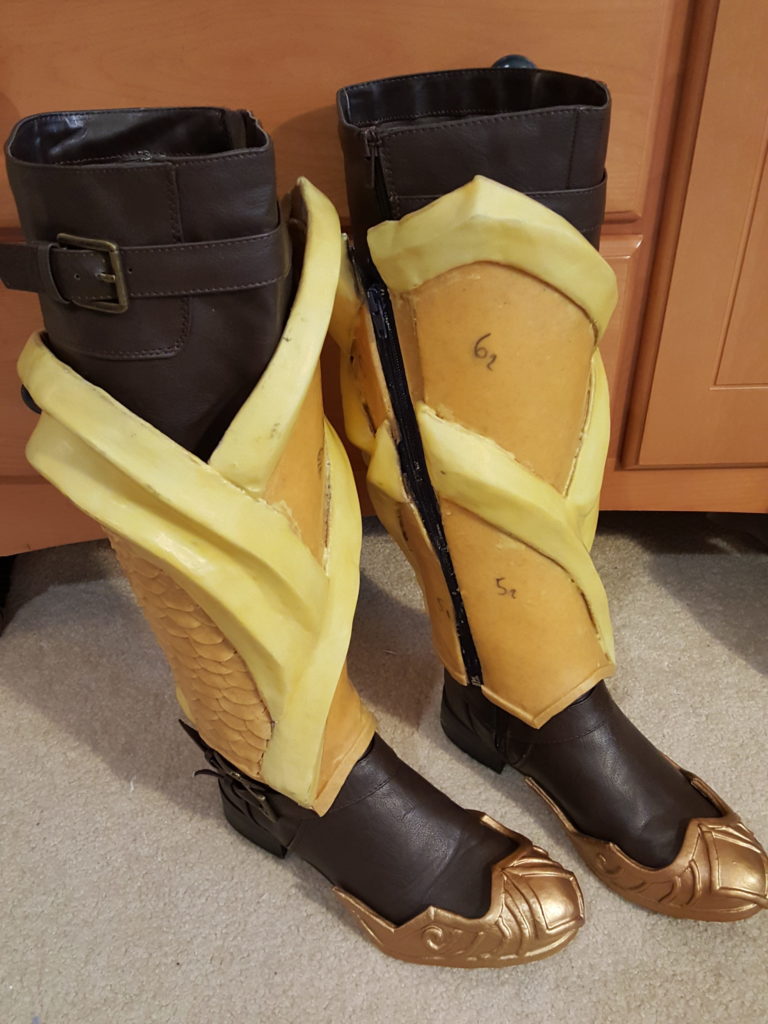
Here’s what it looked like on the boots.
For this cosplay I decided that it was finally time to invest in an airbrush. I spent quite a bit of time researching, and decided to splurge and get an Iwata Eclipse. Quite a few people suggested that it was worth it to get a nicer brush to begin with.
For the paint job I started by priming everything with 6 coats of wood glue, then sprayed everything with a gold Krylon spray paint.

Figuring out my airbrush was certainly a journey. Because it’s a dual -action brush, I have a lot to control, so it took some practice to get even coats. But it looks amazing, so I can’t really complain (except about all the masking I had to do, masking sucks).
Most areas either got a basecoat of blue or purple, with an edge gradient in a darker shade and highlight areas. In the scale areas, I also went in and hand brushed in some weathering to make them pop more.
The gold bevels got highlights and shadows of antique and bright golds, and I used Kamui’s white lining technique on the edges.

Further details were added, such as gold symbols, fur, leather and horns. Some artistic interpretation was used for the belt section, but I tried to keep it loyal to the in game assets.
The horns were made with paperclay wrapped around a shape made of crumpled tin foil. From past work I knew that the horns would crack in a way that would make them seem realistic, so once they dried, I gave them a wash of browns and yellows and wrapped them in leather strips.
I also painted a pair of leggings with a scaled pattern, and added gold striping.

The chest gem needed to be curved to fit flush with my breastplate, so I made a two part mold.

Here the mold is after pouring the first half. I sprayed mold release on and then poured the second side.

For the shoulder fireballs I used Transparent Worbla lit by 36 Neopixels for the glow.
Grand total there are 131 LEDs in the whole costume– 4 in the Boots, 2 in the Vambraces, 1 in the Helm, 72 in the Pauldrons, 32 in the Chest Gem, and 20 in Ban’thalos.
Most of the LEDs are embedded in resin gems cast using Smoothcast 326 and a mix of Slice of the Moon UV powder in green and turquiose.
The LEDs in the shoulders and chest are controlled with an Arduino 5v Pro Trinket from Adafruit. Several patterns were programmed in, including half brightness, full brightness, pulses and fade in, and faux flame like flickering.
A hunter is never without their pet in game, so I figured that I’d recreate my companion in real life. My toon is constantly followed around by Ban’thalos, one of the spirit birds.
I decided that in order to make her seem transparent, I would try using transparent worbla. First I made a template using craft foam, then transferred it to the plastic.
Details on the individual feathers were carved in with a soldering iron and then glued together.
I mounted her on an acrylic stick like I did for the floating fires on my shoulders. It was then linked with wires to the arduino in my shoulder that control the programming of LEDs inserted into the body of the bird.
I then used a wash of blues and greens to highlight the patterns on the feathers and give them a color closely matching that of the bird.

In game my hunter has platinum blonde hair, so I decided to replicate that for my cosplay. Later I switched to a wig with a ponytail because I liked the style better.

I repainted some ears to more closely match my skin tone and added studs that resemble the in game earrings I use.

The leggings I use were painted by hand with a scale pattern and gold strips were overlayed.


