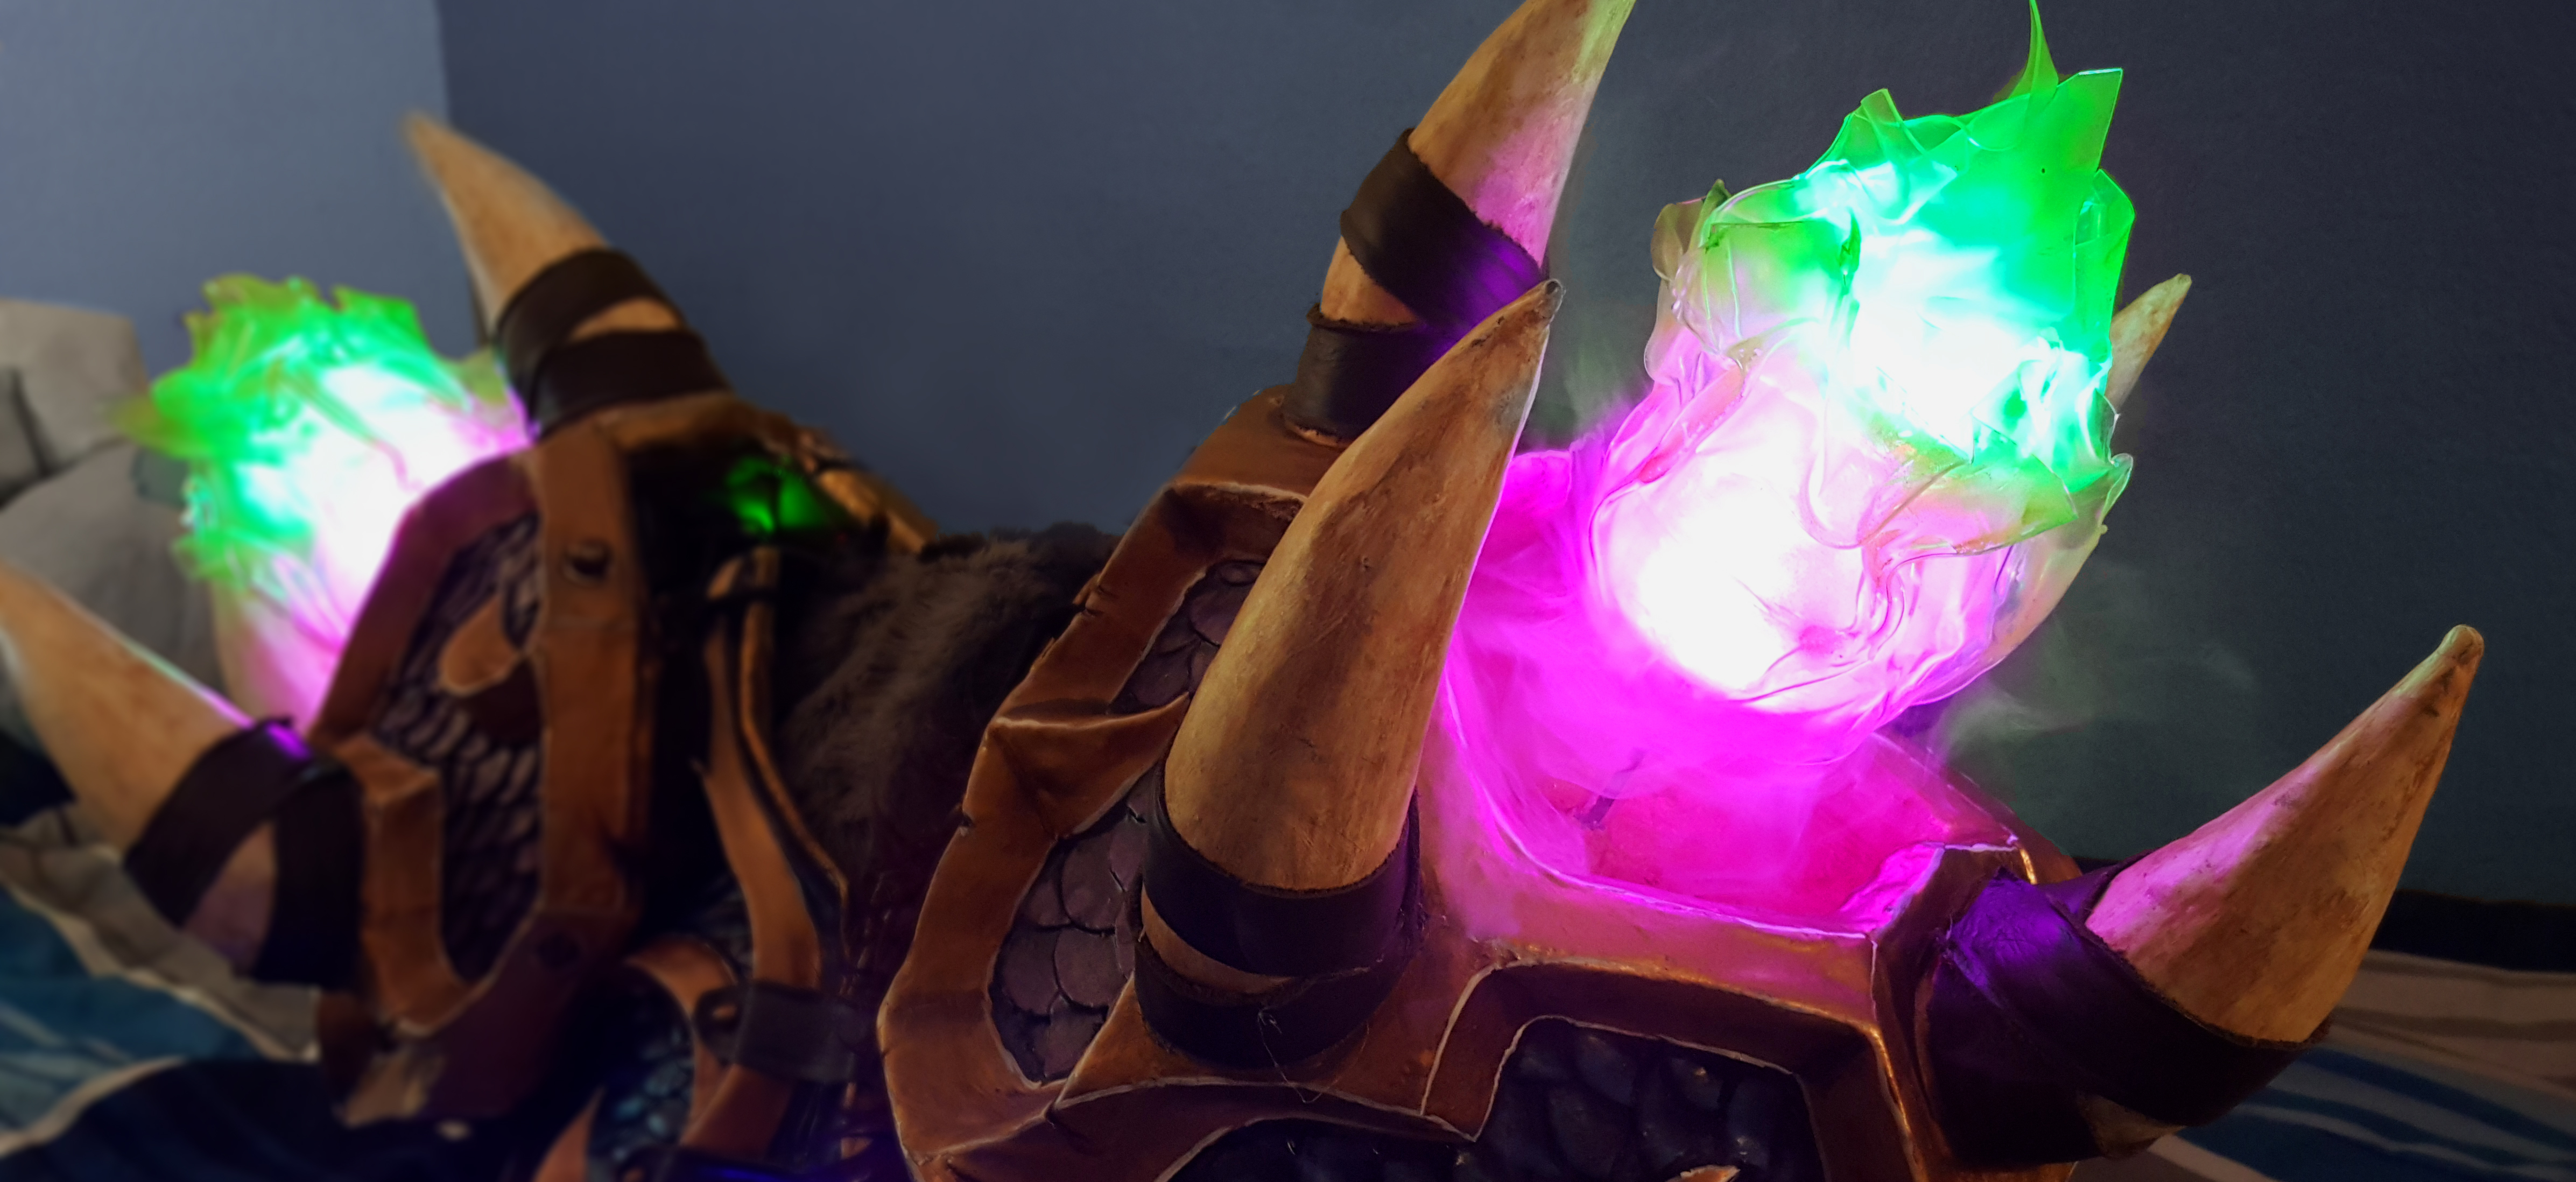
Have you been needing a smoke effect for cosplay, but compact fog machines were too expensive? Look no further, and learn to make your own for ~$50. It can even be remote controlled!
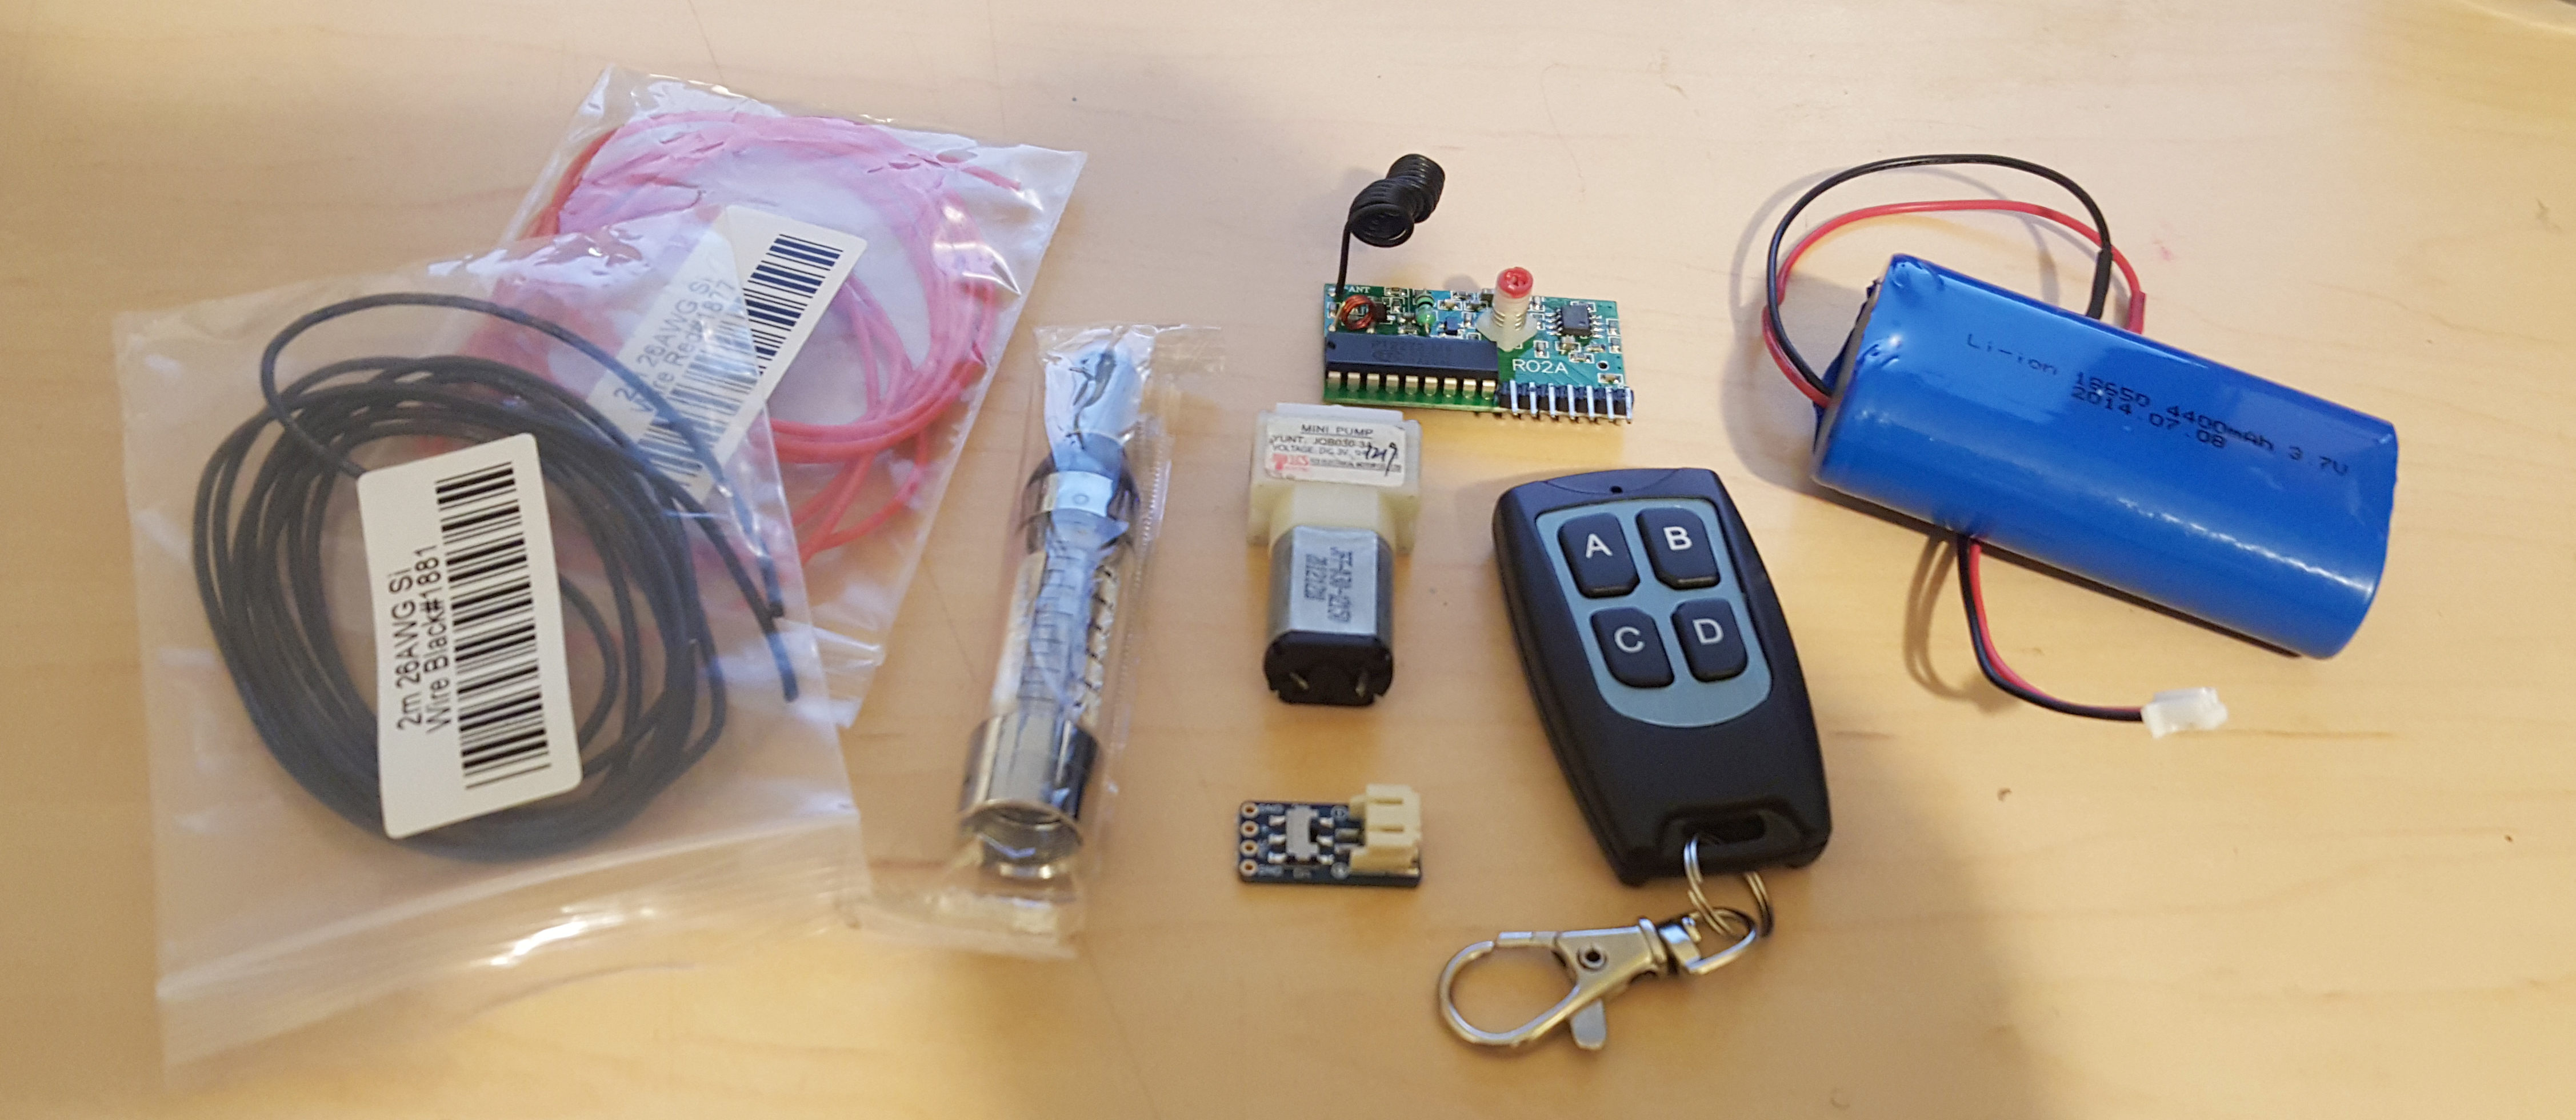
Simple Fog Machine:
For Wireless you’ll also need:
- A T4 RF Reciever (toggles on/off) OR a M4 RF Reciever (hold down for on)
- An N-channel power MOSFET (30V / 60A)
Optional Supplies:
- (Optional) Heatshrink tubing & Electrical Tape
- (Optional) Helping Hands
These are some of the photos I took along the way. They don’t capture everything, but hopefully they should help explain the process.
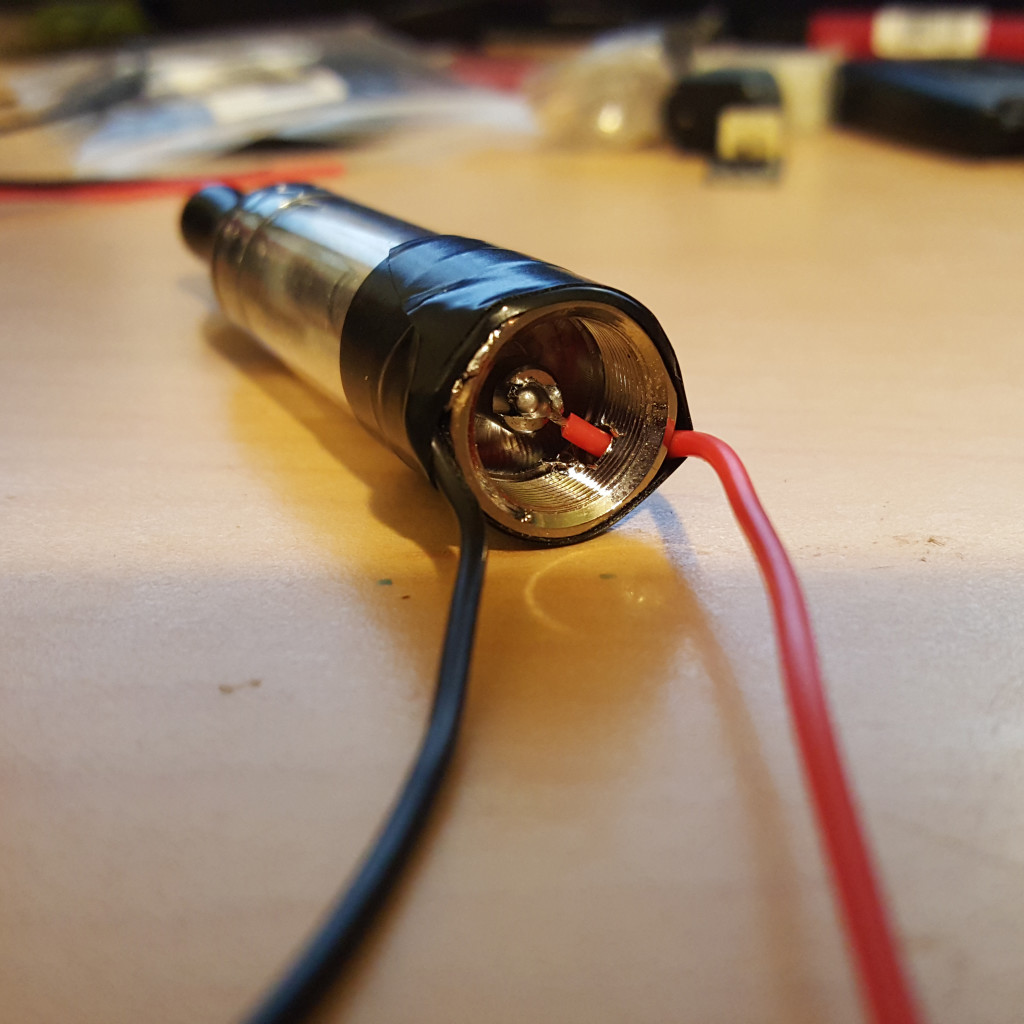
This is the Kanger T2 Cartomizer. It’s the main body of an e-Cig. Normally they’re screwed into a battery and use our breath to suck out vapour, but we can’t do either of those so we have to modify ours. The first thing I did was enlarge one of the two small holes on the side so I could run a wire through it. This wire will be positive (+3.7V) and will get soldered onto the raised post sticking out from the bottom.
It’s REALLY important that you not get solder in the hole at the center because that’s the hole that provides airflow through the Cartomizer and allows the smoke to get pushed out. The negative lead (ground) will get soldered to the outside edge of the screw in section. After you’ve done this, it’s a great idea to securely wrap all of this with electrical tape for protection and strain relief.
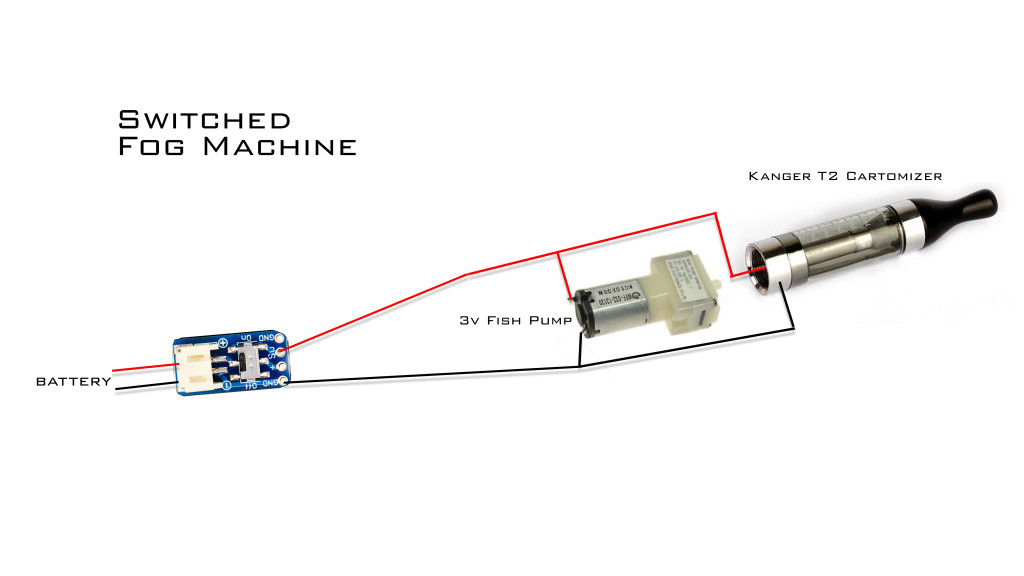
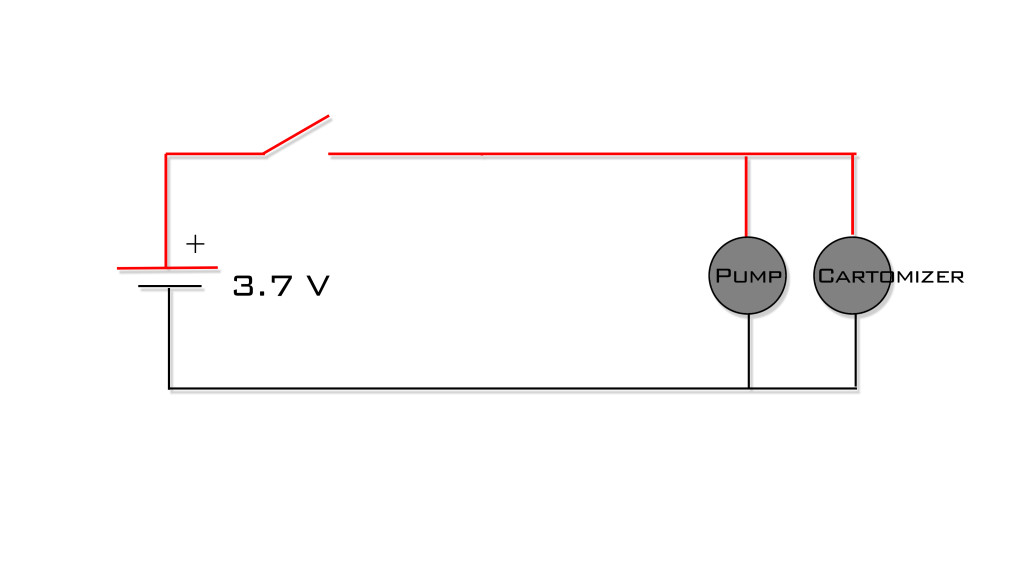
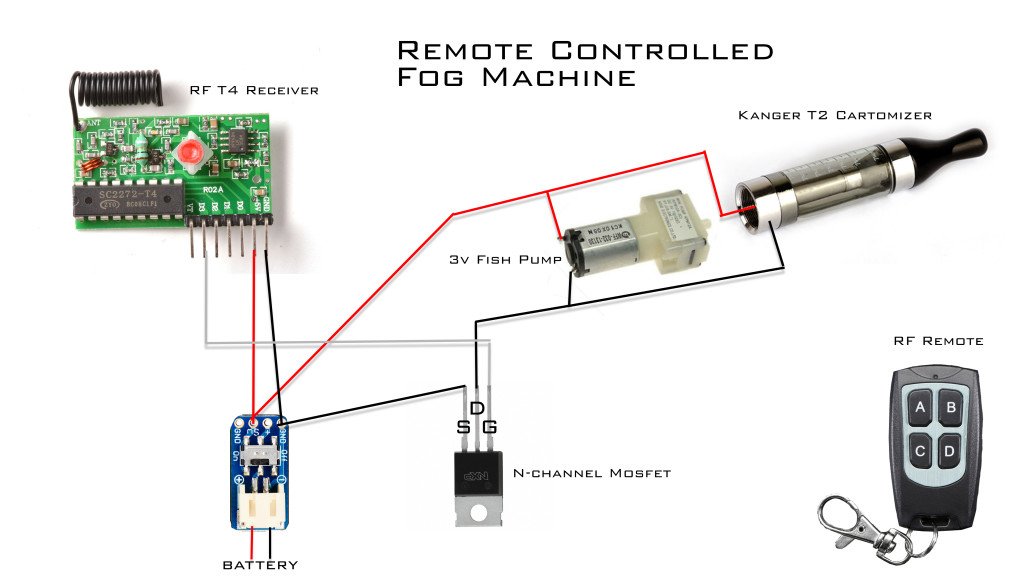
At this point if you just wanted a simple fog machine, you could solder both of the positive power wires and both of the ground wires to their respective terminals on the switch which connects to your battery.
The next couple steps are going to be used for the more complex remote controlled fog machine.
This is the T4 Radio Frequency (RF) Reciever. It allows me to control whether or not smoke is being produced with the touch of a button while the actual smoke machine is hidden in armor. Power and ground (the two right-most pins) get soldered to the power and ground terminals on the switched JST board. Pins D0-D3 correspond to the different buttons on your remote key fob (D3 is A, D2 is B, etc). Pick one that you like, and solder a wire from it to the left pin of the Mosfet (Pin G).





Leave a Comment